UPI, or Unified Payments Interface, has transformed digital transactions in India. It enables instant fund transfers between bank accounts through mobile devices, enhancing security and convenience. UPI's interoperability across banks and payment providers has created a robust ecosystem, promoting financial inclusion and empowering businesses.
What is UPI?
The Unified Payments Interface (UPI) is a real-time payment system developed by the National Payments Corporation of India (NPCI). It facilitates instant money transfers between banks and enables users to link multiple bank accounts to a single mobile application. UPI allows individuals to make payments, send and receive money, and perform various financial transactions directly from their smartphones. It offers a seamless and convenient mode of payment, eliminating the need for traditional methods such as cash, cheques, or credit/debit cards. Unified Payments Interface has gained widespread popularity in India due to its ease of use, security, and interoperability among different banks and payment service providers. It has revolutionised the way people transact and has become a preferred choice for digital payments in the country.
What is UPI ID?
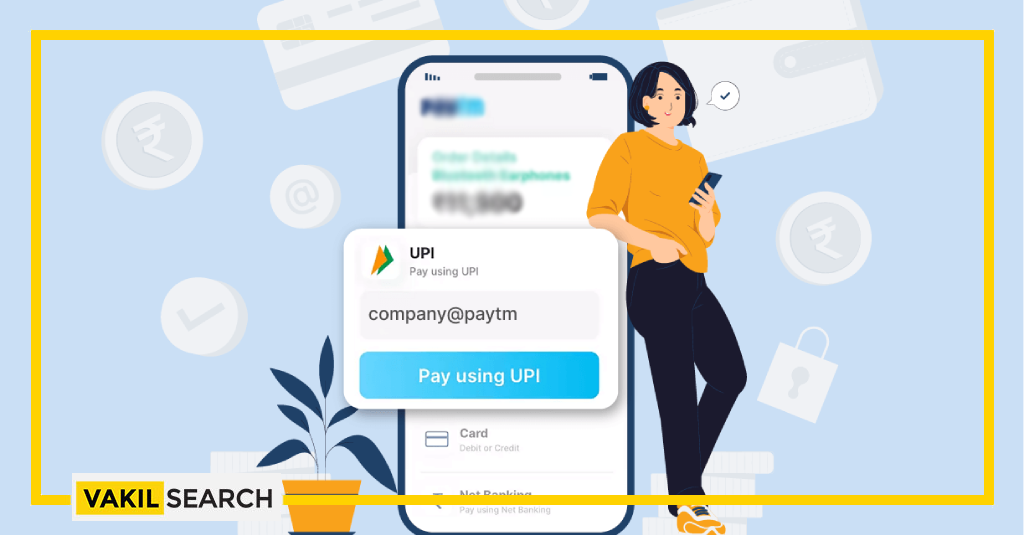
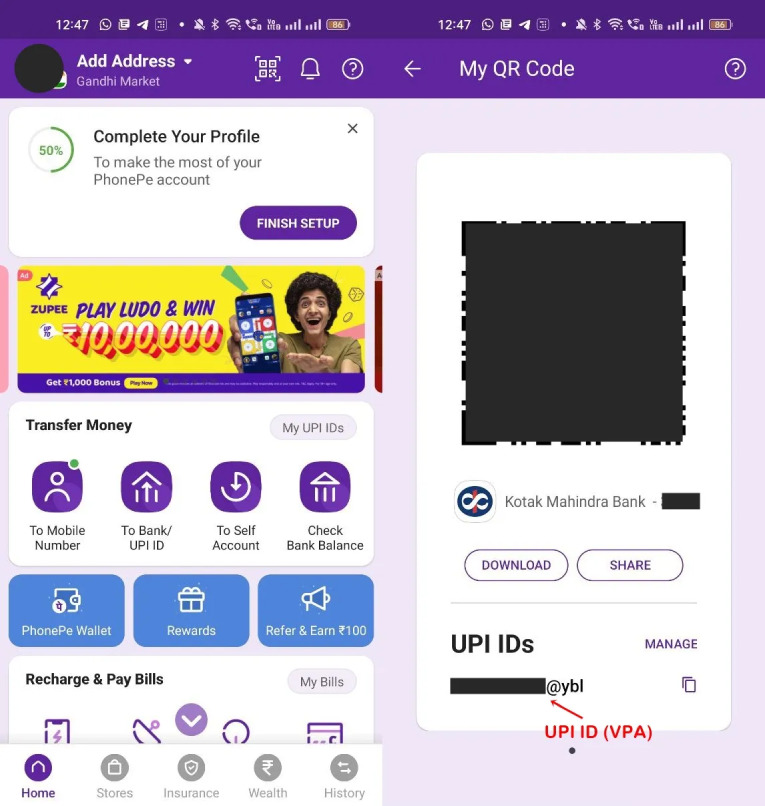
A UPI ID, also known as a Virtual Payment Address (VPA), is a unique identifier associated with the Unified Payments Interface system in India. It is a user-created identifier that is linked to a specific bank account and enables seamless fund transfers.
A Unified Payments Interface ID is formatted as “yourname@bankname” (e.g., johnsmith@bankname), and it serves as a substitute for providing bank account details during transactions. UPI IDs are used to receive money, make payments, and initiate other financial transactions through UPI-enabled apps. They provide a convenient and secure way to conduct digital payments without revealing sensitive bank account information. Each UPI ID is linked to a corresponding bank account, allowing users to easily manage transactions across different banks within the UPI ecosystem.
What is VPA in UPI?
VPA stands for Virtual Payment Address in the context of the Unified Payments Interface (UPI) system in India. A VPA is a unique identifier created by users that is associated with their UPI-enabled bank account. It acts as a virtual representation of a bank account and is used for making and receiving payments through UPI. A VPA typically follows the format “yourname@bankname” (e.g., johnsmith@bankname).
When a user sets up a UPI-enabled app, they create a VPA linked to their bank account. This VPA serves as an alternative to sharing sensitive banking details such as account number and IFSC codes during transactions. Instead, users can simply provide their VPA to send or receive money.
The Unified Payments Interface VPA acts as an alias for the bank account and allows users to make payments without disclosing their account information. It provides a layer of privacy and security in digital transactions while offering convenience and interoperability across different banks and UPI-enabled platforms.
Why UPI?
There are several reasons why the Unified Payments Interface (UPI) has gained significant popularity and become a preferred mode of payment in India. Here are some key reasons:
- Convenience: UPI offers a highly convenient payment experience. Users can make instant payments and transfers directly from their smartphones, eliminating the need for cash or physical cards. It provides a seamless and hassle-free way to conduct transactions anytime and anywhere.
- Real-time Transactions: UPI enables real-time fund transfers, allowing users to send and receive money instantly. This is particularly beneficial for situations that require urgent or time-sensitive payments.
- Easy Setup and Use: Setting up a UPI account is relatively straightforward. Users can link their bank accounts to a UPI-enabled app and create a unique Virtual Payment Address (VPA) for transactions. The intuitive interface and user-friendly design of UPI apps make it easy for people to navigate and use the system.
- Interoperability: UPI offers interoperability across different banks and payment service providers. Users can link multiple bank accounts to a single UPI app and seamlessly transfer funds between different banks. This interoperability makes UPI a versatile and inclusive payment system.
- Security: UPI incorporates robust security measures to ensure the safety of transactions. It uses two-factor authentication, including a secure UPI PIN, to authorize payments. Additionally, UPI transactions are encrypted, reducing the risk of unauthorized access to sensitive information.
- Wide Acceptance: UPI has gained wide acceptance among merchants, online platforms, and service providers in India. It is now supported by a large number of banks, payment apps, and businesses, making it a widely accepted payment method across various sectors.
- Government Support and Initiatives: The Indian government has actively promoted the adoption of digital payments, including UPI, as part of its push towards a cashless economy. This support has led to increased awareness and acceptance of UPI as a reliable and convenient payment solution.
What Makes UPI Unique?
UPI (Unified Payments Interface) stands out from other payment systems due to several unique features:

- Interoperability: UPI is designed to be interoperable, meaning it allows users to link multiple bank accounts to a single UPI ID and make transactions across different banks and payment service providers. This enables seamless fund transfers between various accounts without the need for additional setups or processes.
- Single-platform integration: UPI provides a unified platform for integrating multiple banking services, making it convenient for users to access various financial services through a single mobile application. It consolidates different banking functionalities such as account balance checks, transaction history, and payments, simplifying the user experience.
- Instant and real-time transactions: UPI enables instant fund transfers and real-time transactions. Users can send and receive money immediately, enhancing the speed and efficiency of payments. This real-time capability makes UPI suitable for time-sensitive transactions and provides an enhanced user experience.
- Virtual Payment Address (VPA): UPI uses VPAs as unique identifiers for transactions instead of bank account details. This adds an additional layer of privacy and security since users do not need to share sensitive information like their account number or IFSC code during transactions. VPAs provide a user-friendly and secure way to initiate payments.
- Two-Factor Authentication: UPI incorporates a two-factor authentication system to ensure the security of transactions. Users need to authenticate each transaction using a UPI PIN, which adds an extra layer of protection against unauthorized access and fraudulent activities.
- Simplified Payment Requests: UPI allows users to send payment requests directly to others. This feature simplifies the process of requesting and receiving payments, making it easier to split bills, request money from friends or family, or collect payments from customers.
- Support for Multiple Payment Modes: UPI supports various payment modes, including person-to-person (P2P) payments, merchant payments, bill payments, and in-app purchases. This versatility makes UPI suitable for a wide range of transactions, from small personal payments to large commercial transactions.
- Government-backed Initiative: UPI is backed by the National Payments Corporation of India (NPCI) and has received significant support from the Indian government. This backing has led to widespread adoption, acceptance, and promotion of UPI across the country.
What is UPI Transaction?
A UPI transaction refers to a financial transaction conducted through the Unified Payments Interface (UPI) system in India. UPI enables users to send and receive money, make payments, and perform various financial transactions using their smartphones. UPI transactions are carried out in real-time, allowing for instant fund transfers between bank accounts.
To initiate a UPI transaction, users need to have a UPI-enabled mobile application installed on their smartphones. They link their bank account(s) to the UPI app and create a unique Virtual Payment Address (VPA) or use other payment credentials provided by the app.
UPI transactions can be categorized into the following types:
- Person-to-Person (P2P) Payments: Users can send money directly to other individuals using their UPI ID or mobile number linked to their UPI account. This is a convenient way to transfer funds to friends, family, or anyone with a UPI-enabled app.
- Merchant Payments: UPI enables users to make payments to merchants or businesses. Users can scan QR codes or enter the merchant’s VPA to initiate payment. This method is widely used for in-store purchases, online shopping, and bill payments.
- Bill Payments and Recharges: UPI allows users to pay bills, including utility bills (electricity, water, gas), mobile recharges, DTH (Direct-to-Home) recharges, and more. Users can conveniently initiate these payments through their UPI-enabled app.
- In-App Payments: UPI can be integrated into various mobile applications, allowing users to make payments directly from within the app. This enables seamless transactions while using various services, such as food delivery, cab services, or online marketplace platforms.
- Request Money: UPI allows users to send payment requests to others, simplifying the process of requesting funds. Users can send payment requests using their UPI app, and recipients can approve and make the payment with ease.
UPI transactions require authentication, typically in the form of a UPI PIN, to authorize the transaction and ensure security. These transactions provide a fast, secure, and convenient way to transfer money and make payments, reducing the reliance on traditional payment methods like cash, cheques, or cards.
How Does UPI Work in India?
The Unified Payments Interface (UPI) works through a series of interactions between the user, the UPI-enabled app, and the UPI infrastructure. Here’s a simplified explanation of how UPI works:
- Registration: To start using UPI, users need to download a UPI-enabled mobile app from their respective bank or a third-party provider. They register their mobile number, create a unique UPI ID (also known as Virtual Payment Address or VPA), and link their bank account(s) to the UPI app.
- Initiating a Transaction: To make a UPI transaction, the user selects the desired transaction type, such as person-to-person (P2P) payment, merchant payment, or bill payment, within the UPI app. They enter the recipient’s UPI ID, and mobile number, or scan a QR code to initiate the transaction.
- Authentication: The UPI app prompts the user to enter their UPI PIN, a four or six-digit code set during the registration process. This UPI PIN serves as a second-factor authentication to ensure the security of the transaction.
- Request to Payment Service Provider (PSP): Once the user authorizes the transaction with the UPI PIN, the UPI app sends a request to the user’s selected Payment Service Provider (PSP). The PSP could be the user’s own bank or a third-party app linked to their bank account.
- PSP Verification: The PSP verifies the transaction request and checks the availability of funds in the user’s linked bank account. If the verification is successful, the PSP generates a unique transaction ID and forwards it to the UPI infrastructure.
- Communication with UPI Infrastructure: The UPI infrastructure receives the transaction request from the PSP. It validates the transaction details, including the transaction ID, user credentials, and availability of funds.
- Communication with Recipient’s PSP: The UPI infrastructure identifies the recipient’s PSP based on the provided UPI ID or mobile number. It sends a transaction notification and the required details to the recipient’s PSP.
- Recipient’s PSP Verification: The recipient’s PSP verifies the transaction details and ensures that the recipient’s UPI ID is valid and linked to their bank account.
- Payment Settlement: Once the transaction details are verified by both PSPs, the UPI infrastructure facilitates the transfer of funds between the sender’s and recipient’s bank accounts. The settlement happens in real-time, ensuring an immediate transfer of funds.
- Transaction Confirmation: After the successful completion of the transaction, both the sender and recipient receive a confirmation message on their respective UPI apps. They can also view the transaction details and transaction history within the app.
What are UPI ID and PIN?
A UPI ID (Unified Payments Interface ID) is a unique identifier associated with the UPI system in India. It is also known as a Virtual Payment Address (VPA). A UPI ID is created by the user and linked to their UPI-enabled bank account. It takes the form of “yourname@bankname” (e.g., johnsmith@bankname).
The UPI ID acts as a substitute for sharing sensitive bank account details during transactions. Instead of providing their account number and IFSC code, users can simply share their UPI ID to send or receive money. The UPI ID provides a convenient and secure way to conduct digital payments without revealing personal banking information.
A UPI PIN (Personal Identification Number) is a four or six-digit code set by the user during the registration process of the UPI-enabled app. It serves as a second-factor authentication for authorizing UPI transactions. When initiating a transaction, users are prompted to enter their UPI PIN to validate and authorize the payment. The UPI PIN adds an additional layer of security and ensures that only the authorized user can initiate transactions from their UPI account.
It’s important for users to keep their UPI PIN confidential and not share it with anyone. The UPI PIN helps prevent unauthorized access to the UPI account and protects against fraudulent activities.
What is UPI 2.0?
UPI 2.0 is an upgraded version of the UPI payment system that was launched in 2018. UPI 2.0 offers several new features such as an overdraft facility, invoice in the inbox, signed intent and QR, and one-time mandate, among others.
- Increased Transaction Limits: UPI 2.0 increased the transaction limits for certain types of transactions. For example, the limit for P2P (person-to-person) payments was raised from Rs. 1 lakh to Rs. 2 lakh.
- Overdraft Facility: UPI 2.0 introduced the concept of an overdraft facility linked to UPI. Users could avail a pre-approved overdraft from their bank accounts through the UPI platform.
- Signed Intent and QR: UPI 2.0 incorporated a feature called “Signed Intent and QR” that enabled users to verify the authenticity of merchants and prevent fraud. Merchants could create QR codes with additional details such as the invoice amount and a digitally signed static QR for verification.
- Invoice in the Box: UPI 2.0 introduced the “Invoice in the Box” feature, which allowed merchants to attach invoices or bills along with payment requests. This feature aimed to facilitate seamless reconciliation and record-keeping for businesses.
- Linking Multiple Bank Accounts: UPI 2.0 allowed users to link multiple bank accounts to a single UPI ID. This feature provided flexibility in choosing the account for conducting transactions and simplified fund management.
Features of UPI 2.0
UPI 2.0 introduced several new features and enhancements to the Unified Payments Interface (UPI) system in India. Here are some of the notable features of UPI 2.0:
- Increased Transaction Limits: UPI 2.0 raised the transaction limits for certain types of transactions. For person-to-person (P2P) payments, the limit was increased from Rs. 1 lakh to Rs. 2 lakh, providing users with the ability to make higher-value transactions.
- Overdraft Facility: UPI 2.0 introduced the concept of an overdraft facility, allowing users to link their overdraft accounts to UPI. This feature enables users to avail of pre-approved overdrafts from their bank accounts through the UPI platform, providing additional flexibility and convenience in managing funds.
- One-Time Mandate: UPI 2.0 introduced the “One-Time Mandate” feature, which allows users to pre-authorize a transaction with a merchant for recurring payments. This feature is particularly useful for subscription-based services, loan repayments, and utility bill payments, as it eliminates the need for repeated authorizations for each transaction.
- Signed Intent and QR: UPI 2.0 incorporated the “Signed Intent and QR” feature, enhancing security in merchant transactions. With this feature, merchants can generate a QR code containing additional transaction details and a digital signature. Users can scan the QR code to verify the authenticity of the merchant before proceeding with the transaction, reducing the risk of fraudulent activities.
- Invoice in the Box: UPI 2.0 introduced the “Invoice in the Box” feature, allowing merchants to attach invoices or bills along with payment requests. This simplifies the reconciliation process for businesses and enables seamless record-keeping, enhancing transparency and efficiency in financial transactions.
- Linking Multiple Bank Accounts: UPI 2.0 enabled users to link multiple bank accounts to a single UPI ID. This feature provides flexibility in choosing the desired bank account for conducting transactions, making it easier to manage funds across different accounts.
Who are the Primary Participants in UPI?
- National Payments Corporation of India (NPCI): NPCI is the umbrella organization that developed and operates the UPI system. It is a not-for-profit organization formed by the Reserve Bank of India (RBI) and the Indian Banks’ Association (IBA). NPCI sets the rules, standards, and guidelines for UPI and ensures its smooth functioning.
- Banks: Banks play a crucial role in the UPI ecosystem. They provide the underlying infrastructure and support for UPI transactions. Banks offer UPI-enabled mobile applications to their customers, allowing them to link their bank accounts, create UPI IDs, and initiate UPI transactions. Banks also serve as Payment Service Providers (PSPs) for their customers, facilitating the processing and settlement of UPI transactions.
- Payment Service Providers (PSPs): PSPs are entities authorized by NPCI to provide UPI-based payment services. These include banks as well as non-banking entities such as mobile wallet providers and fintech companies. PSPs develop UPI-enabled mobile apps or integrate UPI functionality into their existing apps, allowing users to access UPI services. They provide the interface for users to initiate and manage UPI transactions, and they interact with NPCI for transaction processing and settlement.
- Users: Users are the individuals or entities who use UPI for making payments, sending or receiving money, and conducting various financial transactions. They register their mobile numbers, link their bank accounts, and create UPI IDs to participate in the UPI system. Users can initiate transactions, authorize payments, and manage their UPI accounts through UPI-enabled mobile apps provided by their banks or PSPs.
- Merchants: Merchants are businesses, both offline and online, that accept payments through UPI. They generate UPI QR codes or share their UPI IDs to receive payments from customers. Merchants need to have UPI-enabled apps or payment solutions to process UPI transactions. They can also utilize UPI for generating payment requests, accepting payments for goods and services, and facilitating seamless transactions with customers.
Benefits of UPI
- Convenience: UPI provides a convenient and user-friendly payment experience. Users can make instant transactions using their smartphones without the need for physical cash or cards. UPI works 24/7, allowing users to initiate transactions anytime, anywhere, and it eliminates the hassle of carrying cash or visiting an ATM.
- Real-time Transactions: UPI enables real-time fund transfers and payments. Transactions are processed instantly, and the funds are transferred immediately between the sender and recipient bank accounts. This ensures quick and seamless transactions, making UPI suitable for various scenarios, including person-to-person payments, merchant transactions, and bill payments.
- Simplified Payments: UPI simplifies the payment process by replacing complex bank account details with a unique UPI ID. Users can link their bank accounts to a UPI ID and use it to send or receive money. This eliminates the need to remember and share sensitive banking information during transactions, enhancing security and reducing errors in payment transfers.
- Interoperability: UPI offers interoperability, allowing users to transact across different banks and payment service providers within the UPI ecosystem. Users can use a UPI app provided by their own bank or choose from a range of third-party UPI apps, giving them flexibility in accessing UPI services. This interoperability promotes competition, innovation, and wider acceptance of UPI as a preferred payment method.
- Secure and Authentication: UPI incorporates robust security measures to protect users’ financial transactions. Transactions require authentication through a UPI PIN, ensuring that only the authorized user can initiate payments. Additionally, UPI uses encrypted channels and secure protocols to safeguard data during transactions, reducing the risk of fraud and unauthorized access.
- Value-added Services: UPI offers value-added services that enhance the payment experience. These services include options like requesting money, generating and scanning QR codes for payments, and linking multiple bank accounts to a single UPI ID. UPI also supports bill payments, mobile recharges, and other utility payments, providing a comprehensive platform for various financial transactions.
- Lower Transaction Costs: UPI transactions typically have lower transaction costs compared to traditional payment methods. UPI promotes digital payments, reducing the reliance on cash transactions, which can incur additional costs such as handling fees or currency conversion charges. This makes UPI an economical choice for individuals and businesses.
Benefits of UPI for Banks
- Enhanced Customer Experience: UPI enables banks to provide their customers with a seamless and user-friendly payment experience. By offering UPI-enabled mobile apps, banks can offer their customers a convenient and efficient way to make instant payments, send or receive money, and manage their finances digitally. This enhances customer satisfaction and loyalty.
- Increased Customer Engagement: UPI allows banks to engage more closely with their customers. By integrating UPI functionality into their mobile apps, banks can provide additional services such as transaction history, account management, and personalized offers. This helps banks strengthen their relationship with customers and encourages active usage of their banking services.
- Competitive Advantage: UPI enables banks to stay competitive in the rapidly evolving digital payment landscape. By offering UPI services, banks can attract tech-savvy customers who prefer the convenience and speed of digital payments. It helps banks position themselves as innovative and customer-centric financial institutions in the market.
- Cost Savings: UPI transactions typically have lower transaction costs compared to traditional payment methods. By promoting digital payments through UPI, banks can reduce the reliance on cash transactions, which can incur additional costs such as handling fees or currency conversion charges. This leads to cost savings for banks and promotes operational efficiency.
- Business Opportunities: UPI opens up new business opportunities for banks. They can leverage UPI to offer value-added services to their customers, such as integrating UPI with merchant payment solutions, enabling UPI-based loan repayments, or supporting UPI for e-commerce transactions. These opportunities allow banks to expand their service offerings and generate additional revenue streams.
- Financial Inclusion: UPI plays a vital role in promoting financial inclusion. By providing UPI services, banks can reach unbanked or underbanked individuals who may not have access to traditional banking services. UPI allows these individuals to transact digitally, making banking services more accessible and inclusive.
- Regulatory Compliance: UPI adheres to regulatory guidelines set by the Reserve Bank of India (RBI) and other relevant authorities. By offering UPI services, banks ensure compliance with regulatory requirements and maintain a secure and trusted payment infrastructure. This helps banks build trust among customers and regulators.
Benefits of UPI for Merchants
- Instant Payments: UPI enables real-time and instant payments, allowing merchants to receive funds immediately in their bank accounts. This eliminates the need for delayed settlement periods associated with traditional payment methods like cheques or card payments. Merchants can experience faster cash flow and improved liquidity.
- Reduced Transaction Costs: UPI transactions typically have lower transaction costs compared to other payment methods. Merchants can enjoy cost savings on transaction fees and processing charges, especially when compared to card-based transactions. This makes UPI an economical choice for businesses, particularly for smaller merchants with lower transaction volumes.
- Wider Customer Reach: UPI has gained significant adoption in India, with a large user base. By accepting UPI payments, merchants can tap into this vast customer base, including tech-savvy individuals who prefer digital payment methods. It allows merchants to cater to a broader customer segment and expand their customer reach.
- Increased Sales Conversion: UPI offers a frictionless payment experience for customers, reducing the payment process’s complexity and time. This streamlined payment process can lead to increased sales conversion rates, as customers find it easier and more convenient to complete purchases. UPI eliminates the need for customers to enter card details or wait for OTPs, enhancing the overall customer experience.
- QR Code Payments: UPI supports QR code-based payments, allowing merchants to generate dynamic QR codes for customers to scan and make payments. QR codes are easy to generate and display, and they provide a contactless payment option, which has become increasingly important in the wake of the COVID-19 pandemic. Merchants can accept UPI payments by simply displaying their UPI QR code, making it accessible to a wide range of customers.
- Simplified Reconciliation: UPI transactions come with detailed transaction information, including payment reference numbers and customer details. This simplifies the reconciliation process for merchants, as they can easily match payments received with specific orders or invoices. The availability of invoice information within UPI transactions further streamlines the record-keeping and accounting processes.
- Secure and Safe Transactions: UPI incorporates robust security measures, including two-factor authentication with UPI PIN, encryption, and secure communication channels. Merchants can have confidence in the security of UPI transactions, reducing the risk of fraudulent activities or unauthorized transactions. This fosters trust between merchants and customers.
Benefits for UPI for Customers
- Convenience: UPI offers a convenient and user-friendly payment experience. Customers can make instant transactions using their smartphones, eliminating the need for physical cash or cards. UPI works 24/7, allowing customers to initiate transactions anytime and anywhere, providing greater flexibility and convenience.
- Real-time Transactions: UPI enables real-time fund transfers and payments. Transactions are processed instantly, and the funds are transferred immediately between bank accounts. This ensures quick and seamless transactions, making UPI suitable for various scenarios, including person-to-person payments, merchant transactions, bill payments, and more.
- Simplified Payments: UPI simplifies the payment process by replacing complex bank account details with a unique UPI ID. Customers can link their bank accounts to a UPI ID and use it to send or receive money. This eliminates the need to remember and share sensitive banking information during transactions, enhancing security and reducing errors in payment transfers.
- Multiple Bank Account Integration: UPI allows customers to link multiple bank accounts to a single UPI ID. This feature provides flexibility in choosing the desired bank account for conducting transactions. Customers can easily switch between different accounts and manage funds across multiple banks, offering convenience and control over their finances.
- Security: UPI incorporates robust security measures to protect customers’ financial transactions. Transactions require authentication through a UPI PIN, ensuring that only the authorized user can initiate payments. Additionally, UPI uses encrypted channels and secure protocols to safeguard data during transactions, reducing the risk of fraud and unauthorized access.
- Value-added Services: UPI offers value-added services that enhance the payment experience. Customers can request money from others, split bills, generate and scan QR codes for payments, and make utility bill payments or mobile recharges, all within the UPI ecosystem. These services provide convenience and versatility for various financial transactions.
- Financial Inclusion: UPI plays a significant role in promoting financial inclusion by providing a digital payment platform to individuals who may not have access to traditional banking services. UPI allows unbanked or underbanked individuals to transact digitally, send and receive money, and make payments without the need for a physical bank account, promoting greater financial inclusion.
- Lower Transaction Costs: UPI transactions typically have lower transaction costs compared to traditional payment methods. By promoting digital payments through UPI, customers can save on costs associated with cash transactions, such as ATM withdrawal fees or currency conversion charges. This makes UPI an economical choice for individuals, allowing them to transact at lower costs.
What Are the Requirements to Open a UPI Account?
- Bank Account: You must have a bank account with any participating bank that supports UPI. Most banks in India have integrated UPI into their services, so you can check with your bank if they offer UPI facilities.
- Smartphone: You need a smartphone with an active internet connection to download and install a UPI-enabled mobile application. UPI apps are available for both Android and iOS devices, and you can choose the app provided by your bank or a third-party UPI app.
- Mobile Number: You should have a mobile number registered with your bank account. The mobile number is used to link your bank account with UPI and receive OTPs (One-Time Passwords) for authentication during UPI transactions.
- UPI-Enabled App: You need to download a UPI-enabled mobile application from your bank or a third-party provider. Popular UPI apps in India include BHIM (Bharat Interface for Money), Google Pay, PhonePe, Paytm, and many more. Install the app from the respective app store and follow the registration process.
- UPI PIN: During the registration process, you will be prompted to create a UPI PIN. The UPI PIN is a 4 to 6-digit numeric code that acts as a password to authenticate your UPI transactions. You will use this PIN to authorize transactions when making payments or sending money through UPI.
- KYC (Know Your Customer): Some UPI apps may require you to complete the KYC process. KYC is a verification process where you provide identity and address proof documents to comply with regulatory requirements. The specific KYC requirements may vary depending on the UPI app and the bank associated with your UPI account.
How to Install and Register a UPI Apps?
- Choose a UPI App: Decide which UPI app you want to use. Popular UPI apps in India include BHIM, Google Pay, PhonePe, Paytm, and many more. You can install the app from the respective app store (Google Play Store for Android or the App Store for iOS).
- Download and Install the App: Search for the chosen UPI app in the app store and click on the “Install” or “Get” button to download and install the app on your smartphone.
- Launch the App: Once the app is installed, locate the app icon on your smartphone’s home screen or app drawer and tap on it to launch the UPI app.
- Select Language and Accept Terms: Upon launching the app, you may be prompted to select your preferred language and accept the terms and conditions of the app. Read through the terms and conditions carefully and proceed to the next step.
- Register/Create Account: To create a UPI account, you will typically have two options: “Register” or “Create Account.” Tap on the appropriate option based on your app’s interface.
- Mobile Number Verification: You will be asked to enter the mobile number associated with your bank account. Make sure to enter the correct mobile number and click on the “Next” or “Continue” button.
- OTP Verification: A One-Time Password (OTP) will be sent to your registered mobile number. Enter the OTP received in the app to verify your mobile number.
- Select Bank and Account: After OTP verification, you will be asked to select your bank from the list of participating banks. Choose your bank and provide additional details, such as your account number or last digits of your debit card, if required.
- Set UPI PIN: Create a UPI PIN (a 4 to 6-digit numeric code) that you will use to authenticate your UPI transactions. Make sure to choose a PIN that is easy for you to remember but difficult for others to guess.
- Link Bank Account: Once your UPI PIN is set, you may be asked to link your bank account to the UPI app. Follow the instructions provided, which may involve providing additional information or completing the KYC (Know Your Customer) process, if required.
- Registration Complete: After successfully linking your bank account, you will receive a confirmation that your UPI registration is complete. You can now start using the UPI app to send/receive money, make payments, and access various UPI services.
Performing a UPI Transaction
- Open the UPI App: Launch the UPI app on your smartphone by tapping on the app icon.
- Login/Register: If you haven’t registered on the app, follow the registration process mentioned earlier. If you are already registered, log in using your credentials, which may include your UPI ID and UPI PIN.
- Select Transaction Option: In the app, you will typically find various transaction options such as “Send Money,” “Scan QR,” “Pay,” or “UPI Payment.” Choose the relevant option based on your transaction requirement.
- Enter Recipient Details: Provide the necessary recipient details. This can be the recipient’s UPI ID (also known as a VPA or Virtual Payment Address), mobile number, or bank account number with IFSC code, depending on the transaction option you selected.
- Verify Recipient Details: Double-check the entered recipient details to ensure accuracy. Verify the recipient’s name or merchant/business name before proceeding.
- Enter Transaction Amount: Enter the amount you want to send or pay to the recipient. Some apps may allow you to select from predefined amounts or provide a custom amount option.
- Add Remarks (Optional): If you want to add any remarks or notes for the transaction, you can do so in the provided remarks field. This step is optional.
- Authenticate Transaction: To authorize the transaction, you will need to enter your UPI PIN. This step ensures the security and authorization of the transaction. Enter your UPI PIN carefully and securely.
- Confirm Transaction: Review the transaction details, including the recipient’s information and the transaction amount. If everything is accurate, confirm the transaction to proceed.
- Transaction Confirmation: Once the transaction is successful, you will receive a confirmation message or notification on the app. This message will include details such as the transaction reference number and the status of the transaction.
- Transaction Status: You can check the transaction status in the app’s transaction history or through any transaction-related notifications received on your smartphone.
UPI Fees and Charges
- Person-to-Person (P2P) Transactions: Many UPI apps offer free person-to-person transactions, allowing users to send and receive money without any transaction fees. This means you can transfer funds to friends, family, or other individuals using UPI without incurring any charges.
- Merchant Transactions: For transactions made to merchants or businesses using UPI, there may be nominal charges involved. These charges are usually borne by the merchant, and customers do not have to pay any additional fees. However, it’s advisable to check with the specific UPI app or the merchant for any applicable charges or fees.
- UPI App Usage Charges: Some UPI apps may impose usage charges or fees for certain services or features. For example, there might be charges for transferring funds from your UPI account to your linked bank account or for specific value-added services provided by the UPI app. It’s recommended to review the terms and conditions of the UPI app or contact customer support to understand any associated charges.
- Bank Charges: Banks may have their own fee structure for UPI transactions. These charges could be applicable for certain types of transactions, such as transferring funds from your bank account to another bank account using UPI. It’s important to check with your bank to understand their specific fees and charges for UPI transactions.
- Other Charges: Depending on the UPI app or bank, there might be additional charges for services like UPI cash withdrawals, UPI balance check, or linking multiple bank accounts to your UPI ID. These charges, if applicable, are usually disclosed by the UPI app or bank.
How Secure Are UPI Transactions?
- PI PIN: UPI transactions require the entry of a UPI PIN (Personal Identification Number) to authorize transactions. The UPI PIN acts as a password and is known only to the user. This PIN is required for every transaction, adding an extra layer of security and ensuring that only the authorized user can initiate transactions.
- Two-Factor Authentication: UPI transactions incorporate two-factor authentication. When initiating a transaction, users receive an OTP (One-Time Password) on their registered mobile number. This OTP is required to verify the transaction and is valid for a limited time. Two-factor authentication adds an additional layer of security by confirming the authenticity of the user before completing the transaction.
- Encryption and Secure Channels: UPI transactions are encrypted using secure protocols and channels, ensuring that the data transmitted during transactions is protected from unauthorized access. Encryption prevents interception or tampering of transaction details, providing a secure environment for sensitive information.
- UPI ID: UPI transactions utilize a UPI ID (Virtual Payment Address) instead of sharing bank account details during transactions. The UPI ID acts as an alias for the user’s bank account and provides an additional level of privacy. This reduces the risk of exposing sensitive information, such as bank account numbers or IFSC codes, during transactions.
- Device Binding: UPI apps often bind the user’s UPI account to a specific device or mobile number. This means that transactions can only be initiated from the registered device or mobile number, adding an extra layer of security and preventing unauthorized access to the user’s UPI account.
- Transaction Limits: UPI transactions have predefined transaction limits set by banks and UPI app providers. These limits restrict the maximum amount that can be transacted in a single transaction or within a specified time period. Transaction limits help mitigate the potential impact of fraudulent transactions by limiting the financial exposure.
- Transaction Alerts and Notifications: UPI apps provide real-time transaction alerts and notifications to keep users informed about their transaction activities. Users receive notifications for successful transactions, failed transactions, and other important updates related to their UPI account. These alerts enable users to monitor and identify any suspicious or unauthorized transactions promptly.
- Continuous Monitoring and Security Updates: UPI infrastructure is continuously monitored by banks, payment service providers, and regulatory authorities to detect and prevent fraudulent activities. Regular security updates and patches are implemented to address any identified vulnerabilities and enhance the overall security of the UPI ecosystem.
How Do I Send Money to Another Person Using UPI App?
- Open the UPI App: Launch the UPI app on your smartphone by tapping on the app icon.
- Login/Register: If you haven’t registered on the app, follow the registration process mentioned earlier. If you are already registered, log in using your credentials, which may include your UPI ID and UPI PIN.
- Select “Send Money” or Similar Option: In the app’s main menu or home screen, look for an option like “Send Money,” “Send,” or “Transfer.” Tap on this option to proceed.
- Choose Payment Method: Depending on the UPI app, you may have different payment methods available. You can typically choose from options like UPI ID, mobile number, account number + IFSC, or scanning a QR code. Select the appropriate payment method based on the details you have for the recipient.
- UPI ID (VPA): If you know the recipient’s UPI ID (Virtual Payment Address), select the UPI ID option and enter their UPI ID (e.g., example@upi) in the provided field.
- Mobile Number: If you have the recipient’s mobile number linked to their UPI account, select the mobile number option and enter their mobile number.
- Account Number + IFSC: If you have the recipient’s bank account number and IFSC code, select the account number option and enter the details in the respective fields.
- Scan QR Code: Some UPI apps provide the option to scan a QR code associated with the recipient’s UPI account. Tap on the “Scan QR” or similar option, grant camera permissions if required, and align the QR code within the camera frame to scan it.
- Enter Transaction Amount: Specify the amount you want to send to the recipient. Enter the amount in the provided field. Some apps may provide predefined amounts or quick options for convenience.
- Verify Recipient Details: Double-check the entered recipient details, such as the UPI ID, mobile number, or account number, to ensure accuracy. Verify the recipient’s name, if displayed, before proceeding.
- Add Remarks (Optional): If you want to add any remarks or notes for the transaction, you can do so in the provided remarks field. This step is optional.
- Authenticate Transaction: To authorize the transaction, you will be prompted to enter your UPI PIN. Enter your UPI PIN carefully and securely. This step ensures the security and authorization of the transaction.
- Confirm Transaction: Review the transaction details, including the recipient’s information and the transaction amount. If everything is accurate, confirm the transaction to proceed.
- Transaction Confirmation: Once the transaction is successful, you will receive a confirmation message or notification on the app. This message will include details such as the transaction reference number and the status of the transaction.
Can I Receive Money on My UPI App?
Yes, you can receive money on your UPI app. UPI (Unified Payments Interface) allows users to both send and receive money using their UPI-enabled app. Here’s how you can receive money on your UPI app:
- Share Your UPI ID: To receive money, you need to share your UPI ID (Virtual Payment Address) with the person who wants to send you money. Your UPI ID is a unique identifier associated with your UPI-enabled bank account. It typically follows the format of “yourname@upi” or “yourphonenumber@upi”. You can find your UPI ID in the UPI app’s profile or settings section.
- Provide UPI ID to Sender: Share your UPI ID with the person who wants to send you money. They can enter your UPI ID in their UPI app to initiate the transaction.
- Notification of Payment: When someone sends you money using your UPI ID, you will receive a notification on your UPI app. The notification will include details such as the sender’s UPI ID, the transaction amount, and any additional remarks the sender may have added.
- Accept the Payment: Open the notification or go to the transaction history section of your UPI app to view the payment. Verify the details to ensure it is from the intended sender and for the correct amount. If everything is accurate, proceed to accept the payment.
- Authenticate Transaction: To accept the payment, you may need to enter your UPI PIN (Personal Identification Number) to authenticate the transaction. This step ensures the security and authorization of the transaction. Enter your UPI PIN carefully and securely.
- Transaction Confirmation: Once you have successfully accepted the payment, you will receive a confirmation message or notification on your UPI app. This message will include details such as the transaction reference number and the status of the transaction.
- Check Balance: After receiving the money, you can check your UPI app’s balance or linked bank account to verify that the funds have been credited.
What is Collect Request? How do I use it?
A ‘Collect Request’ is a feature in UPI (Unified Payments Interface) that allows you to request money from someone using your UPI-enabled app. It enables you to initiate a payment request from the person who owes you money or from whom you need to collect a payment. Here’s how you can use the ‘Collect Request’ feature:
- Open the UPI App: Launch your UPI app on your smartphone by tapping on the app icon.
- Login/Register: If you haven’t registered on the app, follow the registration process mentioned earlier. If you are already registered, log in using your credentials, which may include your UPI ID and UPI PIN.
- Find the ‘Collect Request’ Option: In the app’s main menu or home screen, look for an option like ‘Collect Request,’ ‘Request Money,’ or a similar term. Tap on this option to proceed.
- Enter the Payer’s Details: Specify the details of the person from whom you want to request money. You can typically enter their UPI ID (Virtual Payment Address), mobile number, or select from your contacts if the app provides that option.
- Enter the Request Amount: Enter the amount you want to request from the payer. Input the amount in the provided field.
- Add Remarks (Optional): If you want to add any remarks or notes to the payment request, you can do so in the provided remarks field. This step is optional and can be used to provide context or additional information regarding the payment.
- Review and Send the Request: Double-check the entered details, including the payer’s information and the requested amount. Once everything is accurate, proceed to send the payment request.
- Notification to the Payer: The payer will receive a notification on their UPI app, informing them of your payment request. The notification will include details such as your UPI ID, the requested amount, and any additional remarks you added.
- Payer’s Response: The payer can review the payment request and choose to accept or decline it. They may need to enter their UPI PIN or authenticate the request based on their UPI app’s requirements.
- Transaction Confirmation: Once the payer accepts your payment request and authorizes the transaction, you will receive a notification on your UPI app. This notification will confirm the completion of the transaction and the amount received.
- Check Balance: After receiving the payment, you can check your UPI app’s balance or linked bank account to verify that the funds have been credited.
How Do I Add a Bank Account to an Existing UPI Account?
- Open the UPI App: Launch your UPI-enabled app on your smartphone by tapping on the app icon.
- Login/Register: If you haven’t logged in to your UPI account, enter your credentials (such as UPI ID and UPI PIN) to log in. If you are not registered, follow the registration process mentioned earlier to create a UPI account.
- Access Account Settings: Once you are logged in, navigate to the account settings or profile section of the UPI app. Look for an option like ‘Manage Accounts,’ ‘Linked Accounts,’ or a similar term. Tap on this option to proceed.
- Add Bank Account: Within the account settings, you should find an option to add a bank account. Tap on the ‘Add Bank Account’ or similar button to initiate the process.
- Choose Bank: A list of available banks will be displayed. Select your preferred bank from the list. If you don’t see your bank listed, check if there is an option to ‘Add Other Bank’ or a similar option.
- Verify Mobile Number: In the next step, you may be asked to verify your mobile number associated with the bank account you want to add. The app may send an OTP (One-Time Password) to the registered mobile number. Enter the OTP in the provided field to proceed.
- Link Bank Account: Once your mobile number is verified, you will need to provide your bank account details. This typically includes entering your bank account number and the IFSC (Indian Financial System Code) of the bank branch where your account is held. Carefully enter the information in the respective fields.
- Confirm and Authenticate: After entering the bank account details, review the information for accuracy. Once confirmed, proceed to authenticate the linkage of the bank account. The authentication process may vary depending on the UPI app you are using. It may involve entering your UPI PIN, a transaction password, or any other security measures implemented by the app.
- Bank Account Addition Confirmation: Once the bank account is successfully added to your UPI account, you will receive a confirmation message or notification on your UPI app. The newly linked bank account will be displayed in the account settings section.
- Set as Default (Optional): If you have multiple bank accounts linked to your UPI account, you may have the option to set a default bank account. This is the account that will be used by default for UPI transactions unless you choose a different account during a specific transaction.
How to Pay an Online Merchant Using UPI?
- Choose the Payment Option: When you are ready to make a payment on an online merchant’s website or app, select the UPI payment option. It is usually represented by the UPI logo or the “UPI” text.
- Enter UPI ID or Scan QR Code: Depending on the merchant’s platform, you may be asked to enter the UPI ID (Virtual Payment Address) of the merchant or scan a QR code provided by the merchant. Follow the instructions on the screen to proceed.
- UPI ID (VPA): If the merchant has provided a UPI ID, enter it in the designated field. The UPI ID is typically in the format of “merchantname@upi” or similar.
- QR Code: If the merchant has provided a QR code, select the “Scan QR Code” or similar option in the UPI app. Grant camera permissions if required, and align the QR code within the camera frame to scan it. The UPI app will decode the QR code and retrieve the payment information.
- Enter Payment Amount: Once the UPI ID or QR code is processed, you will be prompted to enter the payment amount. Enter the exact amount you want to pay to the merchant in the provided field.
- Add Remarks (Optional): Some UPI apps allow you to add remarks or notes to the transaction. If desired, you can enter any additional information or notes related to the payment in the remarks field. This step is optional.
- Authenticate Transaction: To authorize the payment, you will need to enter your UPI PIN (Personal Identification Number) in the UPI app. Enter your UPI PIN carefully and securely. This step ensures the security and authorization of the transaction.
- Transaction Confirmation: After successfully entering the UPI PIN, the UPI app will process the payment transaction. Once the payment is completed, you will receive a confirmation message or notification on the app. The message will include details such as the transaction reference number and the status of the transaction.
- Check Payment Status: Depending on the UPI app and the merchant’s platform, you may have the option to check the payment status or view transaction details within the app. If available, you can verify the payment’s success and access the transaction record for future reference.
What is a UPI Mandate?
A UPI (Unified Payments Interface) mandate is a feature that allows users to set up recurring payments or automate regular transactions using UPI. With a UPI mandate, you can provide authorization to a specific merchant or service provider to debit your bank account at predefined intervals or for a specified duration. This eliminates the need for manual initiation of payments for recurring expenses, such as utility bills, subscription fees, loan repayments, insurance premiums, etc. Here’s how UPI mandates work:
- Authorization: As a user, you initiate a UPI mandate by providing your consent and authorization to a merchant or service provider to debit your bank account periodically. This can typically be done through the UPI app or the merchant’s website or app.
- Mandate Setup: During the authorization process, you will be asked to provide necessary details such as the payment frequency (e.g., monthly, quarterly), the payment amount, and the duration for which the mandate will be valid. You may also need to specify the start date of the mandate.
- UPI PIN Authentication: To ensure the security of the mandate setup, you will be required to authenticate the process using your UPI PIN. This step verifies your identity and ensures that only you can set up or modify a UPI mandate associated with your bank account.
- Confirmation and Validation: Once the mandate is set up successfully, you will receive a confirmation message or notification with the details of the mandate, including the payment frequency, amount, duration, and the merchant/service provider’s information. You may also receive a unique mandate reference number for future reference.
- Mandate Execution: As per the agreed-upon schedule, the merchant or service provider will initiate the debit transactions from your bank account using the UPI mandate. The UPI system will automatically authorize and process these transactions without requiring any manual intervention from your end.
- Transaction Notifications: After each successful debit transaction, you will receive a notification or message confirming the payment deduction. The notification may include details such as the transaction amount, the mandate reference number, and the merchant/service provider’s information.
- Mandate Modification/Cancellation: If you need to modify or cancel a UPI mandate, you can usually do so through the UPI app or the merchant’s platform. Depending on the app or platform, you may have options to change the payment frequency, amount, or duration, or cancel the mandate altogether.
How UPI Can Contribute to the Growth of the Economy?
UPI (Unified Payments Interface) can contribute to the growth of the economy in several ways:
- Digital Transactions: UPI promotes digital transactions by providing a convenient, secure, and instant payment method. It reduces the reliance on cash transactions, leading to increased transparency and accountability in the economy. Digital transactions can boost economic growth by improving efficiency, reducing costs, and streamlining financial processes.
- Financial Inclusion: UPI plays a crucial role in promoting financial inclusion by enabling people to access banking and payment services through their smartphones. It eliminates the need for physical bank visits and allows individuals, including those in remote areas, to participate in the formal financial system. Increased financial inclusion can lead to higher savings, investments, and overall economic participation.
- Small and Medium Enterprises (SMEs): UPI provides a level playing field for small and medium enterprises by offering them an easy and affordable means to accept digital payments. It enables SMEs to expand their customer base, reach a wider market, and compete effectively. By facilitating digital transactions, UPI helps SMEs grow, create jobs, and contribute to economic development.
- Cashless Economy: UPI accelerates the transition towards a cashless economy by reducing the dependence on physical currency. Cashless transactions have numerous benefits, including lower costs of printing and managing cash, reduced risks of theft and counterfeiting, and improved efficiency in financial operations. A cashless economy can foster economic growth by enhancing financial stability and promoting formalization.
- Efficiency and Productivity: UPI streamlines payment processes, making them faster, more secure, and cost-effective. It reduces the time and effort required for financial transactions, allowing individuals and businesses to focus on productive activities. Improved efficiency in payment systems can boost productivity, drive innovation, and contribute to overall economic growth.
- Data for Policy Making: UPI transactions generate a significant amount of data related to consumer spending patterns, market trends, and economic activity. This data can be utilized by policymakers, researchers, and businesses to make informed decisions, develop targeted policies, and drive economic development initiatives. Data-driven insights from UPI can contribute to evidence-based policymaking, market analysis, and strategic planning.
- E-commerce and Digital Economy: UPI fuels the growth of e-commerce and the digital economy by providing a seamless payment experience. It enables individuals to make online purchases, access digital services, and participate in the digital marketplace. The expansion of e-commerce and the digital economy can create employment opportunities, stimulate innovation, and contribute to economic growth.
Disadvantages of UPI
While UPI (Unified Payments Interface) offers numerous benefits, it’s important to consider some of the potential disadvantages:
- Internet Dependency: UPI transactions require a stable internet connection to initiate and complete payments. In areas with limited or unreliable internet connectivity, users may face difficulties in conducting UPI transactions. Additionally, any disruptions in internet services or network issues can temporarily hinder the ability to make UPI payments.
- Smartphone Dependence: UPI relies on smartphones and mobile applications for transaction initiation. This can be a disadvantage for individuals who do not own smartphones or have limited access to them. It may exclude segments of the population, particularly those in rural or economically disadvantaged areas, who may not have the necessary technology to participate in UPI transactions.
- Technical Glitches and Downtime: UPI systems and associated mobile apps may experience occasional technical glitches, bugs, or system downtime, which can impact the availability and reliability of UPI services. Such disruptions can temporarily hinder the ability to make or receive payments, causing inconvenience for users and potentially impacting business operations.
- Fraud and Security Risks: As with any digital payment system, UPI transactions carry inherent risks of fraud and security breaches. Users need to remain vigilant and take precautions to protect their UPI credentials, such as UPI ID and UPI PIN, from unauthorized access or phishing attempts. Instances of fraudulent transactions or unauthorized access to UPI accounts can lead to financial losses and inconvenience for users.
- Limited Acceptance: While UPI has gained widespread popularity, its acceptance may still be limited in some areas or by certain merchants. In certain cases, users may encounter situations where UPI is not accepted as a payment option, requiring alternative payment methods or cash transactions. This limited acceptance can inconvenience users who rely solely on UPI for their payment needs.
- Transaction Limits: UPI imposes certain transaction limits, both in terms of the maximum amount per transaction and the cumulative amount within a specified time period. These limits may vary depending on the user’s bank, account type, and transaction history. While these limits are implemented to enhance security, they can restrict larger-value transactions or cause inconvenience for users who frequently need to make high-value payments.
- Dependency on Banks: UPI operates within the banking system, and the functionality and user experience are tied to the individual banks and their UPI apps. Users may encounter disparities in terms of app features, customer support, or overall user experience based on their chosen bank. This dependency on banks can limit users’ flexibility and choice in accessing UPI services.
List of Banks That Offer the UPI Facility
Several banks in India offer the UPI (Unified Payments Interface) facility to their customers. As of my knowledge cutoff in September 2021, some of the prominent banks providing UPI services are:
- State Bank of India (SBI)
- HDFC Bank
- ICICI Bank
- Axis Bank
- Punjab National Bank (PNB)
- Bank of Baroda (BOB)
- Canara Bank
- Union Bank of India
- Bank of India (BOI)
- IndusInd Bank
- Kotak Mahindra Bank
- Yes Bank
- IDBI Bank
- Federal Bank
- Indian Bank
- Central Bank of India
- Corporation Bank
- Andhra Bank
- Punjab & Sind Bank
- UCO Bank
Different Types of UPI Payments
UPI (Unified Payments Interface) offers various types of payment options to cater to different user needs. Here are the different types of UPI payments:
- Person-to-Person (P2P) Payments: P2P payments are the most common type of UPI transactions. Users can transfer money directly from their bank account to another person’s bank account using their UPI ID or mobile number linked to UPI. P2P payments are typically used for sending money to friends, family, or acquaintances.
- Person-to-Merchant (P2M) Payments: UPI also facilitates payments from individuals to merchants or businesses. By scanning a QR code or entering the merchant’s UPI ID, users can make direct payments for goods and services purchased from online or offline merchants.
- Bill Payments: UPI supports the payment of utility bills, such as electricity, water, gas, and phone bills. Users can link their utility billers to their UPI app and conveniently make payments by selecting the respective biller and entering the bill amount.
- In-app Payments: UPI can be integrated into various mobile applications, allowing users to make payments seamlessly within those apps. For instance, users can pay for online shopping, food delivery, travel bookings, or other services directly through the integrated UPI payment option in the respective app.
- Subscription Payments: UPI also facilitates recurring or subscription payments. Users can set up UPI mandates to authorize regular deductions from their bank account for services like insurance premiums, loan EMIs, subscription fees, and other recurring expenses.
- Government Payments: UPI enables users to make payments to government entities for services like tax payments, fee payments, e-challans, and more. Users can select the appropriate government agency or service provider within their UPI app and initiate the payment.
- Cash on Delivery (CoD) Payments: Some e-commerce platforms offer the option of paying for purchases using UPI upon delivery of the goods. Users can select the CoD option during checkout and choose UPI as the payment method when the delivery is made.
Get Your UPI VPA in Different Payment Apps
-
How to Get a UPI VPA in Google Pay (GPay)?
To get a UPI VPA in Google Pay, follow these simple steps:
-
- Download the Google Pay app and create an account.
- Link your bank account to the Google Pay app.
- Go to the “UPI” section and click on “Create VPA.”
- Choose a unique VPA and create a password.
- Verify your details and your UPI VPA will be created.
-
How to Get a UPI VPA in Paytm?
To get a UPI VPA in Paytm, follow these simple steps:
-
- Download the Paytm app and create an account.
- Link your bank account to the Paytm app.
- Go to the “UPI” section and click on “Create UPI ID.”
- Choose a unique UPI ID and create a password.
- Verify your details and your UPI VPA will be created.
-
How to Get a UPI VPA in PhonePe?
To get a UPI VPA in PhonePe, follow these simple steps:
-
- Download the PhonePe app and create an account.
- Link your bank account to the PhonePe app.
- Go to the “UPI” section and click on “Add Bank Account.”
- Choose your bank and enter your account details.
- Set up a UPI PIN and your UPI VPA will be created.
How to File a Complaint Against UPI?
- Contact Your Bank: In case of any UPI-related issue, your first step should be to contact your bank or the Unified Payments Interface service provider associated with your bank account. Explain the nature of your complaint and provide relevant details such as transaction ID, UPI ID, date, and time of the transaction.
- Customer Support Channels: Most banks and UPI service providers have dedicated customer support channels, such as phone helplines, email support, or chat support. Reach out to them and explain your complaint in detail. They will guide you through the complaint resolution process.
- Maintain Documentation: Keep a record of all communication related to your complaint. Note down the date and time of your conversations, the names of the customer support representatives you spoke to, and any reference numbers or complaint IDs provided to you.
- Escalate the Complaint: If your complaint is not resolved satisfactorily at the initial level, you can escalate it to higher authorities within the bank or Unified Payments Interface service provider. Ask for the contact details of the escalation point or raise a written complaint to the designated authority.
- Regulatory Bodies: If your complaint remains unresolved or you are unsatisfied with the resolution provided by the bank or UPI service provider, you can escalate the matter to the appropriate regulatory bodies. In India, you can contact the Reserve Bank of India (RBI) or the National Payments Corporation of India (NPCI) through their designated complaint redressal mechanisms.
- Legal Remedies: If all other avenues fail to resolve your complaint, you may consider seeking legal advice and exploring legal remedies available to you.
How to Complain About a UPI Transaction?
- Contact Your Bank: The first step is to contact your bank, which is linked to your Unified Payments Interface account. Reach out to their customer support helpline or visit the nearest branch. Explain the issue and provide relevant details such as transaction ID, UPI ID, date, and time of the transaction.
- Provide Details: Clearly explain the problem you encountered during the UPI transaction. This could include issues like failed transactions, incorrect deductions, unauthorized transactions, or any other concerns.
- Document the Complaint: Maintain a record of your complaint by noting down the date and time of your communication with the bank, the name of the representative you spoke to, and any reference or complaint numbers provided to you.
- Provide Supporting Documents: If necessary, gather any supporting documents related to the transaction, such as transaction screenshots, transaction receipts, or bank statements. These can help in the investigation and resolution of your complaint.
- Follow-Up: If you don’t receive a satisfactory resolution within a reasonable timeframe, follow up with the bank to inquire about the status of your complaint. Ensure that you maintain a record of all follow-up communications as well.
- Regulatory Bodies: If the bank’s response is unsatisfactory or the complaint remains unresolved, you can escalate the matter to the relevant regulatory bodies. In India, you can contact the Reserve Bank of India (RBI) or the National Payments Corporation of India (NPCI) through their designated complaint redressal mechanisms.
- Legal Remedies: If all other avenues fail, you may consider seeking legal advice and exploring legal remedies available to you.
How to Complain About SBI UPI Transaction?
- Contact SBI Customer Care: The first step is to contact SBI customer care to register your complaint. You can reach out to them through various channels such as phone, email, or online chat. SBI has a dedicated customer care helpline for Unified Payments Interface-related issues.
- Provide Transaction Details: When contacting customer care, provide them with all the necessary transaction details, such as the UPI ID, transaction date and time, transaction amount, and any other relevant information. This will help in identifying and investigating your transaction.
- Explain the Issue: Clearly explain the issue you encountered during the Unified Payments Interface transaction. This could include problems like failed transactions, incorrect deductions, unauthorized transactions, or any other concerns. Provide a detailed description of the issue and how it has affected you.
- Document the Complaint: Maintain a record of your complaint by noting down the date and time of your communication with SBI customer care, the name of the representative you spoke to, and any reference or complaint numbers provided to you.
- Follow-Up: If you don’t receive a satisfactory resolution within a reasonable timeframe, follow up with SBI customer care to inquire about the status of your complaint. Ensure that you maintain a record of all follow-up communications as well.
- Escalation: If your complaint is not resolved at the customer care level, you can escalate the matter within SBI. Request for the complaint to be escalated to higher authorities or the grievance redressal cell of SBI.
- Regulatory Bodies: If you are still unsatisfied with the resolution provided by SBI, you can escalate the complaint to the relevant regulatory bodies. In India, you can contact the Reserve Bank of India (RBI) or the National Payments Corporation of India (NPCI) through their designated complaint redressal mechanisms.
How to Check UPI Complaint Status?
- Contact the Relevant Authority: Reach out to the customer support or complaint redressal department of the bank or Unified Payments Interface service provider with whom you filed the complaint. Provide them with the reference number or complaint ID assigned to your complaint.
- Inquire about the Status: Ask the customer support representative to provide you with an update on the status of your complaint. They should be able to check the progress of your complaint and provide you with the relevant information.
- Online Complaint Tracking: Some banks and UPI service providers offer online complaint tracking facilities on their websites or mobile apps. If available, visit the official website or app of the bank or UPI service provider, navigate to the complaint section, and enter the required details to track the status of your complaint.
- Follow-Up Communication: If you are not satisfied with the response or resolution provided, or if the status of your complaint remains unclear, follow up with the customer support or complaint redressal department. Request for a detailed update or explanation regarding the current status and any further steps that need to be taken.
- Regulatory Bodies: If you have escalated your complaint to the relevant regulatory bodies, such as the Reserve Bank of India (RBI) or the National Payments Corporation of India (NPCI), you can also inquire about the status of your complaint through their complaint redressal mechanisms. Check the official websites or contact their customer support for more information.
Where Can I Complain About UPI Transactions?
If you need to complain about UPI (Unified Payments Interface) transactions, you have several options:
- Bank or UPI Service Provider: The first step is to contact the bank or UPI service provider associated with your UPI account. They usually have dedicated customer support channels, such as helpline numbers, email addresses, or online chat support, where you can raise your complaint. Visit their official website or refer to your account’s documentation for the specific contact information.
- Grievance Redressal Mechanism: Most banks and UPI service providers have a designated grievance redressal mechanism to handle customer complaints. You can visit their official website and look for the grievance redressal section to find information on how to file a complaint. They may provide specific forms or procedures to follow.
- Ombudsman: In case your complaint is not resolved by the bank or UPI service provider, you can approach the Banking Ombudsman appointed by the Reserve Bank of India (RBI). The Banking Ombudsman is an independent authority that handles complaints against banks and UPI service providers. You can find information on how to file a complaint with the Banking Ombudsman on the RBI’s official website.
- Reserve Bank of India (RBI): If you are unable to resolve the issue through the bank or UPI service provider’s grievance redressal mechanism or the Banking Ombudsman, you can lodge a complaint with the RBI. The RBI has a dedicated portal for lodging complaints related to banking and financial services. Visit their official website and follow the instructions provided.
- National Payments Corporation of India (NPCI): The NPCI is the organization that oversees UPI transactions in India. If your complaint pertains to UPI services, you can consider reaching out to the NPCI through their designated complaint redressal channels. Visit their official website for more information on how to file a complaint.
How to Reset the UPI Pin for Bank Account?
- Open the UPI App: Launch the Unified Payments Interface-enabled mobile app associated with your bank account on your smartphone.
- Select “Forgot UPI PIN” or similar option: Look for an option like “Forgot UPI PIN” or “Reset PIN” on the app’s login screen or in the settings menu. The exact wording and location may vary depending on the app.
- Authenticate Yourself: To proceed with the PIN reset process, you will need to verify your identity. This typically involves providing your registered mobile number and other required details. The app may send an OTP (One-Time Password) to your registered mobile number for verification.
- Choose Reset Method: Once your identity is verified, the app will provide you with one or more options to reset your UPI PIN. The available options may include using your debit card details, providing your bank account information, or answering security questions. Select the appropriate reset method based on the options provided.
- Follow the Instructions: Follow the on-screen instructions provided by the app to complete the Unified Payments Interface PIN reset process. This may involve entering your debit card details, providing your bank account information, setting a new UPI PIN, and confirming the changes.
- Confirmation and Activation: After successfully resetting the UPI PIN, you will usually receive a confirmation message on the app or via SMS. The new UPI PIN will be activated, and you can now use it for Unified Payments Interface (UPI) transactions.
UPI FAQs
What is UPI full form?
UPI stands for Unified Payments Interface.
Who initiated UPI?
Unified Payments Interface was initiated by the National Payments Corporation of India (NPCI), which is a not-for-profit organization.
What is an UPI-PIN?
An UPI-PIN is a 4- or 6-digit number that is required to authorize any transaction made through UPI. It is similar to a debit card PIN.
How is UPI different from IMPS?
Unified Payments Interface is a real-time payment system that enables immediate money transfer between bank accounts using a mobile device. IMPS (Immediate Payment Service) is also a real-time interbank electronic fund transfer system, but it requires the bank account details of the beneficiary to be added first.
What is UPI complaint number?
There is no specific UPI complaint number. However, users can contact their respective bank's customer care service to lodge a complaint.
Where to raise UPI complaint?
Users can raise a complaint through their respective bank's customer care service or through the UPI app.
What happens if I entered the wrong UPI-PIN during a transaction?
If you entered the wrong UPI-PIN during a transaction, the transaction will not go through and will be considered as failed.
Do UPI money transfers only happen during banking hours?
No, UPI money transfers can be done 24/7, including bank holidays.
Is it necessary to download the UPI app of your bank?
No, you can download any UPI app of your choice and link your bank account to it.
What should a user do if the UPI transaction fails but the money is debited from the customer's bank account?
The user can raise a complaint through their respective bank's customer care service or through the UPI app. The bank will investigate the matter and refund the money if the transaction was unsuccessful.
Money has been debited from my account even though the transaction is still pending? What should I do?
The user can raise a complaint through their respective bank's customer care service or through the UPI app. The bank will investigate the matter and refund the money if the transaction was unsuccessful.
Is it possible to have more than 1 UPI app on the same smartphone and link them to separate bank accounts?
Yes, it is possible to have multiple UPI apps on the same smartphone and link them to different bank accounts.
What are the mobile platforms that UPI can be used on?
UPI can be used on Android and iOS platforms.
In case I want to register a complaint, how do I do that?
Users can raise a complaint through their respective bank's customer care service or through the UPI app.
I entered a wrong UPI PIN, what will be the consequences?
If you enter a wrong UPI PIN, the transaction will not be authorized, and it will be considered as failed.
What should I do if my bank name is not detected in the UPI app?
Users can contact their bank's customer care service to get their bank account linked to the UPI app.
Is it possible to pay merchants through UPI?
Yes, UPI can be used to pay merchants and for online transactions.
Can money transfer be made on bank holidays?
Yes.
Will the consumer need to register the beneficiary before transferring the funds via UPI? What information would be expected of the beneficiary?
No, you will not be required to register the beneficiary. All you need is the beneficiary’s UPI ID or phone number.
Conclusion
The Unified Payments Interface (UPI) is a revolutionary payment system transforming digital payments in India. UPI offers a wide range of features and benefits, making it one of India’s most popular payment methods. Get basic legal advice from Vakilsearch to know more.
Helpful Links