
Discover how to create a UPI ID easily, whether you have a debit card, bank account, or smartphone. Get step-by-step guides for top apps like Google Pay, PhonePe, Paytm, and various banks.
Learn to effortlessly create your UPI ID using various methods. This comprehensive guide covers steps for Google Pay, PhonePe, Paytm, and bank apps, enabling you to set up your UPI ID without a debit card, bank account, or smartphone.
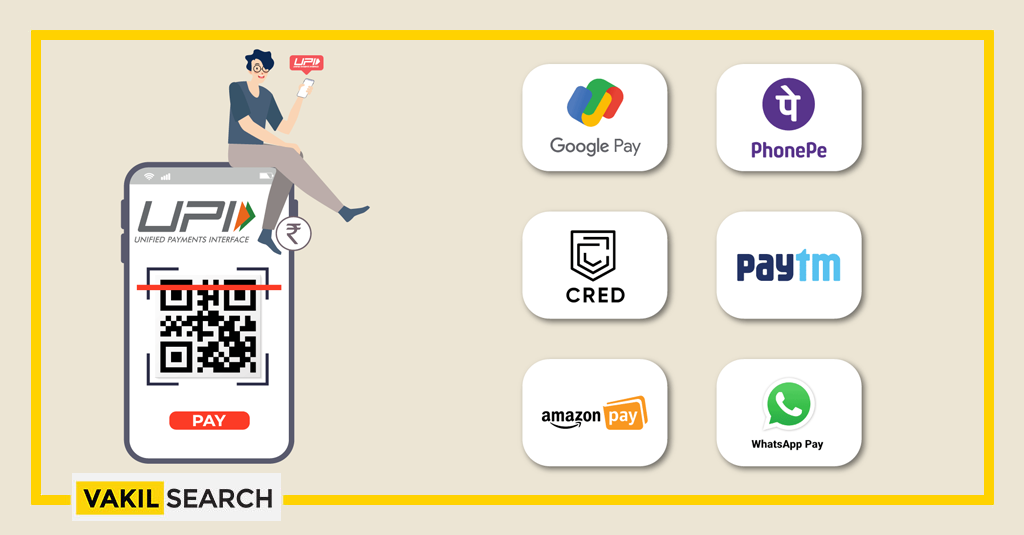
How to Create UPI ID?
To create a UPI (Unified Payments Interface) ID, you need to follow these general steps:
- Choose a UPI App: Download and install a UPI-enabled app from the Google Play Store or Apple App Store. Some popular UPI apps in India include Google Pay, PhonePe, Paytm, BHIM (Bharat Interface for Money), and your bank’s official UPI app.
- Registration: Open the UPI app and start the registration process. You will be asked to provide your mobile number that is linked to your bank account. Make sure the mobile number is active and accessible as you may receive an OTP (One-Time Password) for verification.
- Bank Account Linking: After entering the mobile number, the UPI app will detect the bank associated with that number. Select your bank from the list of available options. The app will initiate the process of linking your bank account with UPI.
- Create a UPI PIN: To secure your UPI transactions, you will need to create UPI PIN. The UPI app will prompt you to enter a 4 or 6-digit UPI PIN. Make sure to choose a unique and secure PIN and avoid using easily guessable combinations like your birthdate or sequential numbers.
- Account Verification: To complete the registration, the UPI app will verify your mobile number by sending an OTP. Enter the OTP received on your registered mobile number to verify your identity.
- UPI ID Creation: Once the verification is successful, you will have the option to create UPI ID. The UPI ID is a unique identifier that is linked to your bank account and can be used for receiving payments. You may be asked to choose a UPI ID of your preference, subject to availability. The UPI ID usually follows the format: yourchosenname@bankname.
- Confirmation and Setup: After creating the UPI ID, the app will display a confirmation screen with your UPI ID details. Review the information and confirm that the details are correct. You may also have the option to customize your UPI settings, such as privacy settings or transaction limits, based on the app’s features.
How to Create UPI ID without a Debit Card?
Below listed points help to Create UPI ID without a Debit Card:
- Choose a UPI App: Download and install a UPI-enabled app from the Google Play Store or Apple App Store. Some popular UPI apps in India include Google Pay, PhonePe, Paytm, BHIM (Bharat Interface for Money), and your bank’s official UPI app.
- Registration: Open the UPI app and start the registration process. You will be asked to provide your mobile number that is linked to your bank account. Make sure the mobile number is active and accessible as you may receive an OTP (One-Time Password) for verification.
- Bank Account Linking: After entering the mobile number, the UPI app will detect the bank associated with that number. Select your bank from the list of available options. In some cases, the UPI app may offer an alternative method for bank account linking if you don’t have a debit card. This method could include options like using your bank account number and IFSC code or using your bank’s mobile banking credentials for verification.
- Verification: Follow the instructions provided by the UPI app to complete the verification process. This may involve entering additional details or credentials specific to your bank account. The app may prompt you to enter an OTP received on your registered mobile number for verification purposes.
- UPI ID Creation: Once the verification is successful, you will have the option to create UPI ID. The UPI ID is a unique identifier that is linked to your bank account and can be used for receiving payments. You may be asked to choose a UPI ID of your preference, subject to availability. The UPI ID usually follows the format: yourchosenname@bankname.
- Confirmation and Setup: After creating the UPI ID, the app will display a confirmation screen with your UPI ID details. Review the information and confirm that the details are correct. You may also have the option to customize your UPI settings, such as privacy settings or transaction limits, based on the app’s features.
How to Create UPI ID without Bank Account?
- Creating a UPI (Unified Payments Interface) ID without a bank account is not possible. UPI is designed to facilitate transactions directly from one bank account to another. To create UPI ID, you need to have a valid bank account with a participating bank.
- UPI relies on the integration between your bank account and the UPI app to initiate and authorize transactions. Without a bank account, you won’t have the necessary credentials or financial linkage required to create and use a UPI ID.
- If you don’t have a bank account, you will first need to open a bank account with a participating bank. Once you have a bank account, you can proceed to register for UPI services by linking your bank account with a UPI-enabled app. This will allow you to create a UPI ID and start using UPI for making and receiving payments.
How to Create UPI ID without an ATM Card?
- Choose a UPI App: Download and install a UPI-enabled app from the Google Play Store or Apple App Store. Some popular UPI apps in India include Google Pay, PhonePe, Paytm, BHIM (Bharat Interface for Money), and your bank’s official UPI app.
- Registration: Open the UPI app and start the registration process. You will be asked to provide your mobile number that is linked to your bank account. Make sure the mobile number is active and accessible as you may receive an OTP (One-Time Password) for verification.
- Bank Account Linking: After entering the mobile number, the UPI app will detect the bank associated with that number. Select your bank from the list of available options. In some cases, the UPI app may offer an alternative method for bank account linking if you don’t have an ATM card. This could include options like using your bank account number and IFSC code or using your bank’s mobile banking credentials for verification.
- Verification: Follow the instructions provided by the UPI app to complete the verification process. This may involve entering additional details or credentials specific to your bank account. The app may prompt you to enter an OTP received on your registered mobile number for verification purposes.
- UPI ID Creation: Once the verification is successful, you will have the option to create UPI ID. The UPI ID is a unique identifier that is linked to your bank account and can be used for receiving payments. You may be asked to choose a UPI ID of your preference, subject to availability. The UPI ID usually follows the format: yourchosenname@bankname.
- Confirmation and Setup: After creating the UPI ID, the app will display a confirmation screen with your UPI ID details. Review the information and confirm that the details are correct. You may also have the option to customize your UPI settings, such as privacy settings or transaction limits, based on the app’s features.
How to Create UPI ID without Apps?
- Creating a UPI (Unified Payments Interface) ID without using a UPI app is not possible. UPI is a system that relies on UPI-enabled apps to facilitate transactions between bank accounts. These apps provide the necessary infrastructure and user interface to manage UPI payments.
- To create UPI ID, you need to download and install a UPI-enabled app from the Google Play Store or Apple App Store. Some popular UPI apps in India include Google Pay, PhonePe, Paytm, BHIM (Bharat Interface for Money), and your bank’s official UPI app.
- The UPI app serves as the platform through which you link your bank account, create UPI ID, and manage your UPI transactions. It provides the necessary security measures and interfaces with your bank to facilitate seamless payments.
- If you wish to create UPI ID, you will need to download a UPI app that is compatible with your device and follow the registration process within the app. This will involve providing your mobile number linked to your bank account, verifying your identity through an OTP (One-Time Password), and linking your bank account to the app.
How to Create UPI ID Without a Smartphone?
- Creating a UPI (Unified Payments Interface) ID without a smartphone is not possible. UPI is a system that relies on UPI-enabled apps, which are specifically designed for smartphones, to facilitate transactions between bank accounts.
- To create a UPI ID, you need to download and install a UPI-enabled app from the Google Play Store or Apple App Store. These apps provide the necessary infrastructure and user interface to manage UPI payments. They require access to the internet, mobile phone capabilities, and a smartphone operating system to function.
How to Create UPI in Payment Transaction Apps?
Create UPI ID in top UPI apps can vary slightly, but the general process involves the following steps:
-
Google Pay:
- Download and install the Google Pay app from the Google Play Store or Apple App Store.
- Open the app and select your preferred language.
- Enter your mobile number that is linked to your bank account.
- Google Pay will verify your number through an OTP (One-Time Password).
- After verification, select your bank from the list of available options.
- Google Pay will detect your bank account associated with the mobile number.
- Set a UPI PIN to secure your transactions.
- Once the PIN is set, you will have your UPI ID automatically created based on your mobile number and bank.
-
PhonePe:
- Download and install the PhonePe app from the Google Play Store or Apple App Store.
- Open the app and choose your preferred language.
- Enter your mobile number for verification.
- PhonePe will send an OTP to verify your number.
- After verification, select your bank from the list of available options.
- PhonePe will fetch your bank account details.
- Set a 4-digit PIN for UPI transactions.
- Once the PIN is set, your UPI ID will be automatically generated based on your mobile number and bank.
-
Paytm:
- Download and install the Paytm app from the Google Play Store or Apple App Store.
- Open the app and tap on the “UPI” option on the home screen.
- Enter your mobile number that is linked to your bank account.
- Paytm will verify your number with an OTP.
- Select your bank from the list of available options.
- Set a 4 or 6-digit UPI PIN for transactions.
- Once the PIN is set, your UPI ID will be created using your mobile number and bank.
These are general steps to create UPI ID in popular UPI apps. However, the specific steps and options may vary based on app updates and your region. It’s recommended to carefully follow the instructions provided by the app during the registration process to create your UPI ID successfully.
How to Create UPI ID in Google Pay?

- Download and Install: Go to the Google Play Store (for Android devices) or the Apple App Store (for iOS devices) and search for “Google Pay.” Download and install the app on your smartphone.
- Launch the App: Open the Google Pay app by tapping on its icon from your app drawer.
- Set Up Google Pay: If you’re using Google Pay for the first time, you’ll need to set it up. Follow the on-screen instructions to choose your preferred language and provide the necessary permissions.
- Add Bank Account: To create UPI ID, you need to link your bank account with Google Pay. Tap on the “Add Bank Account” option on the home screen or navigate to the profile settings within the app.
- Select Your Bank: Google Pay will display a list of popular banks. Choose your bank from the available options. If your bank is not listed, you can search for it by typing the bank’s name in the search bar.
- Verify Your Mobile Number: Google Pay will verify your mobile number that is linked to your bank account. Make sure you have access to the mobile number and tap on “Proceed” to receive an OTP (One-Time Password).
- Enter OTP and Create UPI PIN: Enter the OTP received on your registered mobile number. Once the OTP is verified, you’ll be prompted to set a UPI PIN. This PIN is required for authorizing UPI transactions. Set a 4 to 6-digit UPI PIN of your choice.
- Create UPI ID: After setting the UPI PIN, Google Pay will automatically create UPI ID for you based on your registered mobile number and bank. The UPI ID usually follows the format: yourmobilenumber@bankname.
- Confirmation and Setup: Review the UPI ID displayed on the screen and ensure it is correct. You may also have the option to customize your privacy settings or transaction limits based on the app’s features. Once you confirm, your UPI ID is created, and you can start using it for UPI transactions.
How to Create UPI ID in Google Pay without a Debit Card?
To create a UPI (Unified Payments Interface) ID in Google Pay without a debit card, you can follow these steps:
- Download and Install: Go to the Google Play Store (for Android devices) or the Apple App Store (for iOS devices) and search for “Google Pay.” Download and install the app on your smartphone.
- Launch the App: Open the Google Pay app by tapping on its icon from your app drawer.
- Set Up Google Pay: If you’re using Google Pay for the first time, you’ll need to set it up. Follow the on-screen instructions to choose your preferred language and provide the necessary permissions.
- Add Bank Account: To create UPI ID, you need to link your bank account with Google Pay. Tap on the “Add Bank Account” option on the home screen or navigate to the profile settings within the app.
- Select Your Bank: Google Pay will display a list of popular banks. If your bank is not listed, you can search for it by typing the bank’s name in the search bar.
- Verification without Debit Card: Normally, Google Pay requires verification through a debit card. However, if you don’t have a debit card, you may try the alternative verification method provided by Google Pay. Tap on the “Verify using another method” option or a similar alternative option if available.
- Alternate Verification Methods: Google Pay may offer alternative methods for verification, such as using your bank account number and IFSC code or using your bank’s mobile banking credentials. Follow the instructions provided by Google Pay to complete the verification process using the alternative method.
- Create UPI PIN: Once the verification is successful, you’ll be prompted to set a UPI PIN. This PIN is required for authorizing UPI transactions. Set a 4 to 6-digit UPI PIN of your choice.
- Create UPI ID: After setting the UPI PIN, Google Pay will automatically create UPI ID for you based on your registered mobile number and bank. The UPI ID usually follows the format: yourmobilenumber@bankname.
- Confirmation and Setup: Review the UPI ID displayed on the screen and ensure it is correct. You may also have the option to customize your privacy settings or transaction limits based on the app’s features. Once you confirm, your UPI ID is created, and you can start using it for UPI transactions.
How to Create UPI ID in PhonePe?
To create UPI (Unified Payments Interface) ID in PhonePe, you can follow these steps:

- Download and Install: Go to the Google Play Store (for Android devices) or the Apple App Store (for iOS devices) and search for “PhonePe.” Download and install the app on your smartphone.
- Launch the App: Open the PhonePe app by tapping on its icon from your app drawer.
- Set Up PhonePe: If you’re using PhonePe for the first time, you’ll need to set it up. Follow the on-screen instructions to choose your preferred language and provide the necessary permissions.
- Verify Your Mobile Number: On the welcome screen, enter your mobile number that is linked to your bank account. PhonePe will send an OTP (One-Time Password) to your registered mobile number for verification.
- Create PhonePe Account: After verifying your mobile number, you’ll be prompted to set a 4-digit login PIN for accessing the app. Set a PIN of your choice and confirm it.
- Add Bank Account: Tap on the “My Money” tab at the bottom of the screen, and then tap on “Bank Accounts.” Select your bank from the list of available options.
- Link Bank Account: PhonePe will fetch your bank account details using your registered mobile number. Follow the on-screen instructions to provide any additional details required for bank account linking.
- Set UPI PIN: Once your bank account is linked, you’ll be asked to set a UPI PIN for authorizing UPI transactions. Set a 4 or 6-digit UPI PIN of your choice and confirm it.
- Create UPI ID: After setting the UPI PIN, PhonePe will automatically create UPI ID for you based on your registered mobile number and bank. The UPI ID usually follows the format: yourmobilenumber@ybl (PhonePe’s UPI handle).
- Confirmation and Setup: Review the UPI ID displayed on the screen and ensure it is correct. You may also have the option to customize your privacy settings or transaction limits based on the app’s features. Once you confirm, your UPI ID is created, and you can start using it for UPI transactions.
How to Create UPI ID in PhonePe Without a Debit Card?
To create a UPI (Unified Payments Interface) ID in PhonePe without a debit card, you can follow these steps:
- Download and Install: Go to the Google Play Store (for Android devices) or the Apple App Store (for iOS devices) and search for “PhonePe.” Download and install the app on your smartphone.
- Launch the App: Open the PhonePe app by tapping on its icon from your app drawer.
- Set Up PhonePe: If you’re using PhonePe for the first time, you’ll need to set it up. Follow the on-screen instructions to choose your preferred language and provide the necessary permissions.
- Verify Your Mobile Number: On the welcome screen, enter your mobile number that is linked to your bank account. PhonePe will send an OTP (One-Time Password) to your registered mobile number for verification.
- Create PhonePe Account: After verifying your mobile number, you’ll be prompted to set a 4-digit login PIN for accessing the app. Set a PIN of your choice and confirm it.
- Add Bank Account: Tap on the “My Money” tab at the bottom of the screen, and then tap on “Bank Accounts.” Select your bank from the list of available options.
- Bank Account Verification: PhonePe provides multiple methods for bank account verification. If you don’t have a debit card, you can try verifying your bank account using the following alternative methods, if available:
- Internet Banking: Some banks allow verification through internet banking. You may need to log in to your bank’s internet banking portal using your credentials to complete the verification process.
- BHIM UPI ID: PhonePe may provide an option to enter an existing BHIM UPI ID associated with your bank account. Enter your BHIM UPI ID to verify your bank account.
- Set UPI PIN: Once your bank account is successfully verified, you’ll be asked to set a UPI PIN for authorizing UPI transactions. Set a 4 or 6-digit UPI PIN of your choice and confirm it.
- Create UPI ID: After setting the UPI PIN, PhonePe will automatically create UPI ID for you based on your registered mobile number and bank. The UPI ID usually follows the format: yourmobilenumber@ybl (PhonePe’s UPI handle).
- Confirmation and Setup: Review the UPI ID displayed on the screen and ensure it is correct. You may also have the option to customize your privacy settings or transaction limits based on the app’s features. Once you confirm, your UPI ID is created, and you can start using it for UPI transactions.
How to Create UPI ID in Paytm?
To create a UPI (Unified Payments Interface) ID in Paytm, you can follow these steps:
- Download and Install: Go to the Google Play Store (for Android devices) or the Apple App Store (for iOS devices) and search for “Paytm.” Download and install the app on your smartphone.
- Launch the App: Open the Paytm app by tapping on its icon from your app drawer.
- Set Up Paytm: If you’re using Paytm for the first time, you’ll need to set it up. Follow the on-screen instructions to choose your preferred language and provide the necessary permissions.
- Register or Login: If you already have a Paytm account, log in using your credentials. If you don’t have an account, you can register by providing your mobile number and creating a password.
- Link Bank Account: Tap on the “Bank” option at the bottom of the screen. Select your bank from the list of available options or tap on “Add Bank Account” if your bank is not listed.
- Verification: Paytm will initiate the bank account verification process. You may need to enter your bank account number and the IFSC code to link your bank account. Follow the on-screen instructions to complete the verification process. Paytm may require additional information based on your bank’s requirements.
- Set UPI PIN: Once your bank account is linked and verified, Paytm will prompt you to set a UPI PIN. This PIN is required for authorizing UPI transactions. Set a 4 or 6-digit UPI PIN of your choice and confirm it.
- Create UPI ID: After setting the UPI PIN, Paytm will automatically create UPI ID for you based on your registered mobile number and bank. The UPI ID usually follows the format: yourmobilenumber@paytm (Paytm’s UPI handle).
- Confirmation and Setup: Review the UPI ID displayed on the screen and ensure it is correct. You may also have the option to customize your privacy settings or transaction limits based on the app’s features. Once you confirm, your UPI ID is created, and you can start using it for UPI transactions.
How to Create UPI ID in Paytm without a Debit Card?
To create a UPI (Unified Payments Interface) ID in Paytm without a debit card, you can follow these steps:
- Download and Install: Go to the Google Play Store (for Android devices) or the Apple App Store (for iOS devices) and search for “Paytm.” Download and install the app on your smartphone.
- Launch the App: Open the Paytm app by tapping on its icon from your app drawer.
- Set Up Paytm: If you’re using Paytm for the first time, you’ll need to set it up. Follow the on-screen instructions to choose your preferred language and provide the necessary permissions.
- Register or Login: If you already have a Paytm account, log in using your credentials. If you don’t have an account, you can register by providing your mobile number and creating a password.
- Link Bank Account: Tap on the “Bank” option at the bottom of the screen. Select your bank from the list of available options or tap on “Add Bank Account” if your bank is not listed.
- Verification without Debit Card: Paytm provides an alternative method for bank account verification if you don’t have a debit card. Tap on the “Verify using different method” or similar option if available.
- Alternative Verification Methods: Paytm may offer alternative methods for bank account verification, such as using your bank account number and IFSC code or using your bank’s mobile banking credentials. Follow the instructions provided by Paytm to complete the verification process using the alternative method.
- Set UPI PIN: Once your bank account is successfully linked and verified, Paytm will prompt you to set a UPI PIN. This PIN is required for authorizing UPI transactions. Set a 4 or 6-digit UPI PIN of your choice and confirm it.
- Create UPI ID: After setting the UPI PIN, Paytm will automatically create UPI ID for you based on your registered mobile number and bank. The UPI ID usually follows the format: yourmobilenumber@paytm (Paytm’s UPI handle).
- Confirmation and Setup: Review the UPI ID displayed on the screen and ensure it is correct. You may also have the option to customize your privacy settings or transaction limits based on the app’s features. Once you confirm, your UPI ID is created, and you can start using it for UPI transactions.
How to Create UPI ID in BHIM?
To create a UPI (Unified Payments Interface) ID in BHIM (Bharat Interface for Money), you can follow these steps:

- Download and Install: Go to the Google Play Store (for Android devices) or the Apple App Store (for iOS devices) and search for “BHIM.” Download and install the BHIM app on your smartphone.
- Launch the App: Open the BHIM app by tapping on its icon from your app drawer.
- Choose Language: Select your preferred language from the list of available options.
- Verify Mobile Number: On the welcome screen, BHIM will automatically verify the mobile number linked to your bank account. Make sure the mobile number is active and accessible on the device.
- Select Bank: BHIM will display a list of banks. Select your bank from the list. If your bank is not listed, you may need to try a different UPI-enabled app or check if your bank supports UPI.
- Set UPI PIN: BHIM will send an SMS to your registered mobile number for verification. The app will automatically detect the SMS and verify your mobile number. Set a 4 or 6-digit UPI PIN of your choice and confirm it.
- Create UPI ID: After setting the UPI PIN, BHIM will automatically create a UPI ID for you based on your registered mobile number and bank. The UPI ID usually follows the format: yourmobilenumber@upi (BHIM’s UPI handle).
- Confirmation and Setup: Review the UPI ID displayed on the screen and ensure it is correct. You may also have the option to customize your privacy settings or transaction limits based on the app’s features. Once you confirm, your UPI ID is created, and you can start using it for UPI transactions.
How to Create UPI in Banks?
To create a UPI (Unified Payments Interface) in banks, you can follow these general steps:
- Visit the Bank: Visit the nearest branch of your bank or any branch that offers UPI services.
- Application Form: Request an application form for UPI registration or express your interest in creating a UPI ID to the bank representative.
- Provide Details: Fill out the required information in the application form, which typically includes your personal details such as name, mobile number, bank account number, and other relevant information.
- Submit the Form: Submit the completed application form to the bank representative.
- Bank Verification: The bank will verify the provided information and link your bank account with UPI.
- UPI Registration: Once the bank verifies your details, they will generate a UPI ID for you based on your registered mobile number and bank account. The UPI ID usually follows the format: yourmobilenumber@bankname.
- UPI PIN Setup: The bank will guide you on how to set a UPI PIN, which is a unique 4 or 6-digit PIN required for authorizing UPI transactions.
- Confirmation and Setup: Verify the UPI ID provided by the bank and ensure it is correct. You may also have the option to customize your UPI transaction limits and privacy settings, if available.
- Activation: The bank will activate your UPI ID, and you can start using it for UPI transactions.
How to Create UPI ID in Indian Bank?
To create a UPI (Unified Payments Interface) ID in Indian Bank, you can follow these steps:

- Mobile Banking Registration: Ensure that you have registered for mobile banking services with Indian Bank. If you haven’t registered yet, visit your nearest Indian Bank branch and request mobile banking registration.
- Install Indian Bank Mobile Banking App: Download and install the Indian Bank Mobile Banking app from the Google Play Store (for Android devices) or the Apple App Store (for iOS devices).
- Launch the App: Open the Indian Bank Mobile Banking app by tapping on its icon from your app drawer.
- Login: Log in to the app using your mobile banking credentials. If you haven’t registered for mobile banking yet, you may need to follow the registration process provided by the app.
- Access UPI Section: Once you are logged in, navigate to the UPI section within the Indian Bank Mobile Banking app. The exact location of the UPI section may vary based on the app’s user interface.
- UPI Registration: Follow the on-screen instructions to register for UPI. You will be required to provide your personal details, including your name, mobile number, and bank account number. Ensure that the information you provide matches the details registered with the bank.
- Set UPI PIN: During the registration process, you will be prompted to set a UPI PIN. This PIN is required for authorizing UPI transactions. Set a 4 or 6-digit UPI PIN of your choice and confirm it.
- UPI ID Creation: After completing the registration and setting the UPI PIN, the Indian Bank Mobile Banking app will generate a UPI ID for you. The UPI ID typically follows the format: yourmobilenumber@indianbank (Indian Bank’s UPI handle).
- Confirmation and Setup: Review the UPI ID displayed on the screen and ensure it is correct. You may also have the option to customize your UPI transaction limits and privacy settings, if available.
- Activation: Once you confirm the UPI ID, it will be activated, and
How to Create UPI ID in ICICI Bank?
To create a UPI (Unified Payments Interface) ID in ICICI Bank, you can follow these steps:

- Install iMobile App: Download and install the ICICI Bank iMobile app from the Google Play Store (for Android devices) or the Apple App Store (for iOS devices).
- Launch the App: Open the iMobile app by tapping on its icon from your app drawer.
- Login/Register: Log in to the app using your ICICI Bank internet banking credentials. If you are a new user and don’t have internet banking credentials, you can register for iMobile within the app.
- Access UPI Section: Once you are logged in, navigate to the UPI section within the iMobile app. This section is usually located in the main menu or under the “Payments” category.
- UPI Registration: Follow the on-screen instructions to register for UPI. You will be prompted to provide your personal details, including your name, mobile number, and bank account number. Make sure the information you provide matches the details registered with ICICI Bank.
- Set UPI PIN: During the registration process, you will be prompted to set a UPI PIN. This PIN is required for authorizing UPI transactions. Set a 4 or 6-digit UPI PIN of your choice and confirm it.
- UPI ID Creation: After completing the registration and setting the UPI PIN, the iMobile app will generate a UPI ID for you. The UPI ID typically follows the format: yourmobilenumber@icici (ICICI Bank’s UPI handle).
- Confirmation and Setup: Review the UPI ID displayed on the screen and ensure it is correct. You may also have the option to customize your UPI transaction limits and privacy settings, if available.
- Activation: Once you confirm the UPI ID, it will be activated, and you can start using it for UPI transactions.
How to Create UPI ID in the SBI YONO App?
To create a UPI (Unified Payments Interface) ID in the SBI YONO app, you can follow these steps:

- Install the YONO App: Download and install the SBI YONO app from the Google Play Store (for Android devices) or the Apple App Store (for iOS devices).
- Launch the App: Open the YONO app by tapping on its icon from your app drawer.
- Login/Register: Log in to the app using your SBI internet banking credentials. If you are a new user and don’t have internet banking credentials, you can register for YONO within the app.
- Access UPI Section: Once you are logged in, navigate to the UPI section within the YONO app. This section is usually located in the main menu or under the “UPI & Bharat BillPay” category.
- UPI Registration: Follow the on-screen instructions to register for UPI. You will be prompted to provide your personal details, including your name, mobile number, and bank account number. Ensure that the information you provide matches the details registered with SBI.
- Set UPI PIN: During the registration process, you will be prompted to set a UPI PIN. This PIN is required for authorizing UPI transactions. Set a 4 or 6-digit UPI PIN of your choice and confirm it.
- UPI ID Creation: After completing the registration and setting the UPI PIN, the YONO app will generate a UPI ID for you. The UPI ID typically follows the format: yourmobilenumber@sbi (SBI’s UPI handle).
- Confirmation and Setup: Review the UPI ID displayed on the screen and ensure it is correct. You may also have the option to customize your UPI transaction limits and privacy settings, if available.
- Activation: Once you confirm the UPI ID, it will be activated, and you can start using it for UPI transactions.
How to Create UPI ID in Axis Bank?
To create a UPI (Unified Payments Interface) ID in Axis Bank, you can follow these steps:

- Install Axis Mobile App: Download and install the Axis Mobile app from the Google Play Store (for Android devices) or the Apple App Store (for iOS devices).
- Launch the App: Open the Axis Mobile app by tapping on its icon from your app drawer.
- Login/Register: Log in to the app using your Axis Bank internet banking credentials. If you are a new user and don’t have internet banking credentials, you can register for Axis Mobile within the app.
- Access UPI Section: Once you are logged in, navigate to the UPI section within the Axis Mobile app. This section is usually located in the main menu or under the “UPI” category.
- UPI Registration: Follow the on-screen instructions to register for UPI. You will be prompted to provide your personal details, including your name, mobile number, and bank account number. Ensure that the information you provide matches the details registered with Axis Bank.
- Set UPI PIN: During the registration process, you will be prompted to set a UPI PIN. This PIN is required for authorizing UPI transactions. Set a 4 or 6-digit UPI PIN of your choice and confirm it.
- UPI ID Creation: After completing the registration and setting the UPI PIN, the Axis Mobile app will generate a UPI ID for you. The UPI ID typically follows the format: yourmobilenumber@axisbank (Axis Bank’s UPI handle).
- Confirmation and Setup: Review the UPI ID displayed on the screen and ensure it is correct. You may also have the option to customize your UPI transaction limits and privacy settings, if available.
- Activation: Once you confirm the UPI ID, it will be activated, and you can start using it for UPI transactions.
How to Create UPI ID in Canara Bank?
To create a UPI (Unified Payments Interface) ID in Canara Bank, you can follow these steps:

- Install Canara Bank UPI App: Download and install the Canara Bank UPI app from the Google Play Store (for Android devices) or the Apple App Store (for iOS devices).
- Launch the App: Open the Canara Bank UPI app by tapping on its icon from your app drawer.
- Select Language and Agree to Terms: Choose your preferred language and accept the terms and conditions presented by the app.
- Verify Mobile Number: Enter your registered mobile number with Canara Bank and verify it through the OTP (One-Time Password) sent to your mobile number.
- Set Login PIN: Set a secure 6-digit Login PIN of your choice for accessing the Canara Bank UPI app.
- Add Bank Account: Link your Canara Bank account to the UPI app by providing the necessary details such as your account number, IFSC code, and branch name.
- Set UPI PIN: During the registration process, you will be prompted to set a UPI PIN. This PIN is required for authorizing UPI transactions. Set a 4 or 6-digit UPI PIN of your choice and confirm it.
- UPI ID Creation: After completing the registration and setting the UPI PIN, the Canara Bank UPI app will generate a UPI ID for you. The UPI ID typically follows the format: yourmobilenumber@canarabank (Canara Bank’s UPI handle).
- Confirmation and Setup: Review the UPI ID displayed on the screen and ensure it is correct. You may also have the option to customize your UPI transaction limits and privacy settings, if available.
- Activation: Once you confirm the UPI ID, it will be activated, and you can start using it for UPI transactions.
How to Create UPI ID in Bank of India?
To create a UPI (Unified Payments Interface) ID in Bank of India, you can follow these steps:

- Install BOI UPI App: Download and install the BOI UPI app from the Google Play Store (for Android devices) or the Apple App Store (for iOS devices).
- Launch the App: Open the BOI UPI app by tapping on its icon from your app drawer.
- Select Language and Agree to Terms: Choose your preferred language and accept the terms and conditions presented by the app.
- Verify Mobile Number: Enter your registered mobile number with Bank of India and verify it through the OTP (One-Time Password) sent to your mobile number.
- Set Login PIN: Set a secure 4-digit Login PIN of your choice for accessing the BOI UPI app.
- Add Bank Account: Link your Bank of India account to the UPI app by providing the necessary details such as your account number, IFSC code, and branch name.
- Set UPI PIN: During the registration process, you will be prompted to set a UPI PIN. This PIN is required for authorizing UPI transactions. Set a 4 or 6-digit UPI PIN of your choice and confirm it.
- UPI ID Creation: After completing the registration and setting the UPI PIN, the BOI UPI app will generate a UPI ID for you. The UPI ID typically follows the format: yourmobilenumber@boi (Bank of India’s UPI handle).
- Confirmation and Setup: Review the UPI ID displayed on the screen and ensure it is correct. You may also have the option to customize your UPI transaction limits and privacy settings, if available.
- Activation: Once you confirm the UPI ID, it will be activated, and you can start using it for UPI transactions.
How to Create UPI ID in Bank of Baroda?

- Install Baroda M-Connect Plus App: Download and install the Baroda M-Connect Plus app from the Google Play Store (for Android devices) or the Apple App Store (for iOS devices).
- Launch the App: Open the Baroda M-Connect Plus app by tapping on its icon from your app drawer.
- Login/Register: Log in to the app using your Bank of Baroda internet banking credentials. If you are a new user and don’t have internet banking credentials, you can register for Baroda M-Connect Plus within the app.
- Access UPI Section: Once you are logged in, navigate to the UPI section within the Baroda M-Connect Plus app. This section is usually located in the main menu or under the “UPI” category.
- UPI Registration: Follow the on-screen instructions to register for UPI. You will be prompted to provide your personal details, including your name, mobile number, and bank account number. Ensure that the information you provide matches the details registered with Bank of Baroda.
- Set UPI PIN: During the registration process, you will be prompted to set a UPI PIN. This PIN is required for authorizing UPI transactions. Set a 4 or 6-digit UPI PIN of your choice and confirm it.
- UPI ID Creation: After completing the registration and setting the UPI PIN, the Baroda M-Connect Plus app will generate a UPI ID for you. The UPI ID typically follows the format: yourmobilenumber@barodampay (Bank of Baroda’s UPI handle).
- Confirmation and Setup: Review the UPI ID displayed on the screen and ensure it is correct. You may also have the option to customize your UPI transaction limits and privacy settings, if available.
- Activation: Once you confirm the UPI ID, it will be activated, and you can start using it for UPI transactions.
How to Create UPI ID in Bank of Maharashtra?
To create a UPI (Unified Payments Interface) ID in Bank of Maharashtra, you can follow these steps:

- Install Maha UPI App: Download and install the Maha UPI app from the Google Play Store (for Android devices) or the Apple App Store (for iOS devices).
- Launch the App: Open the Maha UPI app by tapping on its icon from your app drawer.
- Select Language and Agree to Terms: Choose your preferred language and accept the terms and conditions presented by the app.
- Verify Mobile Number: Enter your registered mobile number with Bank of Maharashtra and verify it through the OTP (One-Time Password) sent to your mobile number.
- Set Login PIN: Set a secure 4 or 6-digit Login PIN of your choice for accessing the Maha UPI app.
- Add Bank Account: Link your Bank of Maharashtra account to the UPI app by providing the necessary details such as your account number, IFSC code, and branch name.
- Set UPI PIN: During the registration process, you will be prompted to set a UPI PIN. This PIN is required for authorizing UPI transactions. Set a 4 or 6-digit UPI PIN of your choice and confirm it.
- UPI ID Creation: After completing the registration and setting the UPI PIN, the Maha UPI app will generate a UPI ID for you. The UPI ID typically follows the format: yourmobilenumber@mahabank (Bank of Maharashtra’s UPI handle).
- Confirmation and Setup: Review the UPI ID displayed on the screen and ensure it is correct. You may also have the option to customize your UPI transaction limits and privacy settings, if available.
- Activation: Once you confirm the UPI ID, it will be activated, and you can start using it for UPI transactions.
How to Create UPI ID in HDFC Bank?

- Install HDFC Bank Mobile Banking App: Download and install the HDFC Bank Mobile Banking app from the Google Play Store (for Android devices) or the Apple App Store (for iOS devices).
- Launch the App: Open the HDFC Bank Mobile Banking app by tapping on its icon from your app drawer.
- Login/Register: Log in to the app using your HDFC Bank internet banking credentials. If you are a new user and don’t have internet banking credentials, you can register for HDFC Bank Mobile Banking within the app.
- Access UPI Section: Once you are logged in, navigate to the UPI section within the HDFC Bank Mobile Banking app. This section is usually located in the main menu or under the “UPI” category.
- UPI Registration: Follow the on-screen instructions to register for UPI. You will be prompted to provide your personal details, including your name, mobile number, and bank account number. Ensure that the information you provide matches the details registered with HDFC Bank.
- Set UPI PIN: During the registration process, you will be prompted to set a UPI PIN. This PIN is required for authorizing UPI transactions. Set a 4 or 6-digit UPI PIN of your choice and confirm it.
- UPI ID Creation: After completing the registration and setting the UPI PIN, the HDFC Bank Mobile Banking app will generate a UPI ID for you. The UPI ID typically follows the format: yourmobilenumber@hdfcbank (HDFC Bank’s UPI handle).
- Confirmation and Setup: Review the UPI ID displayed on the screen and ensure it is correct. You may also have the option to customize your UPI transaction limits and privacy settings, if available.
- Activation: Once you confirm the UPI ID, it will be activated, and you can start using it for UPI transactions.
How to Create UPI ID in Union Bank of India?

- Install Union Bank UPI App: Download and install the Union Bank UPI app from the Google Play Store (for Android devices) or the Apple App Store (for iOS devices).
- Launch the App: Open the Union Bank UPI app by tapping on its icon from your app drawer.
- Select Language and Agree to Terms: Choose your preferred language and accept the terms and conditions presented by the app.
- Verify Mobile Number: Enter your registered mobile number with Union Bank of India and verify it through the OTP (One-Time Password) sent to your mobile number.
- Set Login PIN: Set a secure 4 or 6-digit Login PIN of your choice for accessing the Union Bank UPI app.
- Add Bank Account: Link your Union Bank of India account to the UPI app by providing the necessary details such as your account number, IFSC code, and branch name.
- Set UPI PIN: During the registration process, you will be prompted to set a UPI PIN. This PIN is required for authorizing UPI transactions. Set a 4 or 6-digit UPI PIN of your choice and confirm it.
- UPI ID Creation: After completing the registration and setting the UPI PIN, the Union Bank UPI app will generate a UPI ID for you. The UPI ID typically follows the format: yourmobilenumber@unionbank (Union Bank of India’s UPI handle).
- Confirmation and Setup: Review the UPI ID displayed on the screen and ensure it is correct. You may also have the option to customize your UPI transaction limits and privacy settings, if available.
- Activation: Once you confirm the UPI ID, it will be activated, and you can start using it for UPI transactions.
How to Create UPI ID in Kotak Bank?

- Install Kotak Bank Mobile Banking App: Download and install the Kotak Bank Mobile Banking app from the Google Play Store (for Android devices) or the Apple App Store (for iOS devices).
- Launch the App: Open the Kotak Bank Mobile Banking app by tapping on its icon from your app drawer.
- Login/Register: Log in to the app using your Kotak Bank internet banking credentials. If you are a new user and don’t have internet banking credentials, you can register for Kotak Bank Mobile Banking within the app.
- Access UPI Section: Once you are logged in, navigate to the UPI section within the Kotak Bank Mobile Banking app. This section is usually located in the main menu or under the “UPI” category.
- UPI Registration: Follow the on-screen instructions to register for UPI. You will be prompted to provide your personal details, including your name, mobile number, and bank account number. Ensure that the information you provide matches the details registered with Kotak Bank.
- Set UPI PIN: During the registration process, you will be prompted to set a UPI PIN. This PIN is required for authorizing UPI transactions. Set a 4 or 6-digit UPI PIN of your choice and confirm it.
- UPI ID Creation: After completing the registration and setting the UPI PIN, the Kotak Bank Mobile Banking app will generate a UPI ID for you. The UPI ID typically follows the format: yourmobilenumber@kotak (Kotak Bank’s UPI handle).
- Confirmation and Setup: Review the UPI ID displayed on the screen and ensure it is correct. You may also have the option to customize your UPI transaction limits and privacy settings, if available.
- Activation: Once you confirm the UPI ID, it will be activated, and you can start using it for UPI transactions.