Since 1895, Punjab National Bank (PNB), India's first domestic bank, has been in existence. The bank is currently ranked second in terms of network and business. To learn more about PNB net banking continue reading..
PNB is a public sector bank with its headquarters in India and provides its clients with a range of banking services via branch and PNB net banking. Customers of Punjab National Bank can manage their financial transactions and access their accounts online whenever it is convenient for them, from their homes or places of employment. It is a free feature that enables you to access a wide variety of financial services, including fund transfers, credit card payments, online tax filing, paying utility bills, etc.
PNB Net Banking Key Highlights
| Owner | Government of India |
| Founder | Dyal Singh Majithia and Lala Lajpat Rai |
| Headquarters | New Delhi, India |
| Customer service | 1800 180 2222 |
| Founded | 19 May 1894 |
| CEO | Atul Kumar Goel |
Features of PNB Net Banking Services
The following is a list of the features of PNB online banking services:
PNB Internet Banking provides financial services.
-
- You can transfer money between PNB bank accounts or to accounts held by other parties by using the PNB net banking service.
- Online accounts for fixed deposits and recurring deposits can be opened, and the FD/RD instructions can be changed.
- On holidays and weekends, the Inter-Bank (with other banks or third parties) Fund Transfer facility is available around-the-clock.
- Through the IMPS, NEFT, and RTGS payment platforms, you can transfer money.
- Modify and close your FD account online. You can also close an early or mature FD account online.
- You can transfer money to government accounts, commercial accounts, PPF, and SSA accounts.
- To open a PPF account, go online rather than to a bank branch.
- You can view the information by linking to the Demat account.
- Pay your credit card balance as well as your electricity bills.
- By using the PNB Net Banking platform, you can pay your direct and indirect taxes online.
Steps for New PNB Net Banking Registration
The procedure for registering to use PNB net banking service is as follows. The following details the registration procedure for Retail and Corporate customers:
PNB Net Banking Registration for Retail Users
-
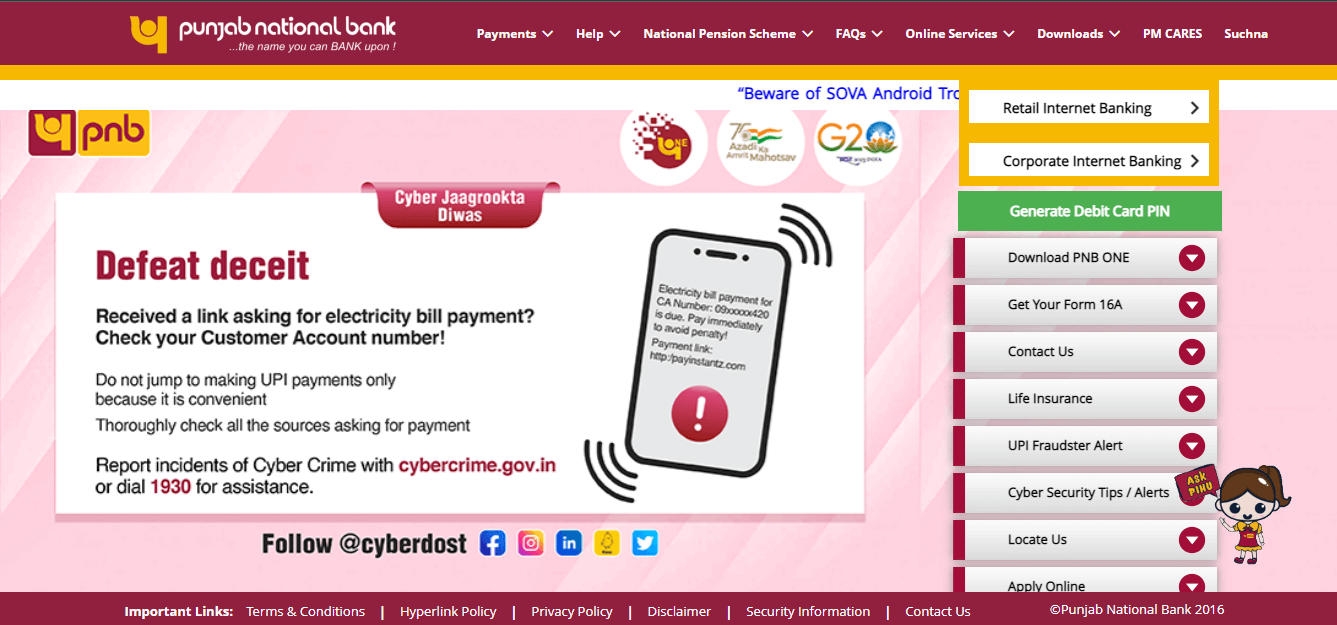
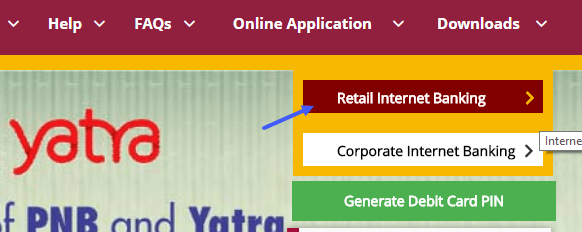
- Go to https://www.pnbindia.in/retail-Internet-banking.html first. (PNB Retail Users Net Banking)
-
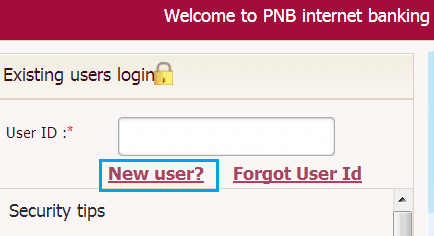
- Select the “Internet Banking Login” option, and then select “New User?”
-
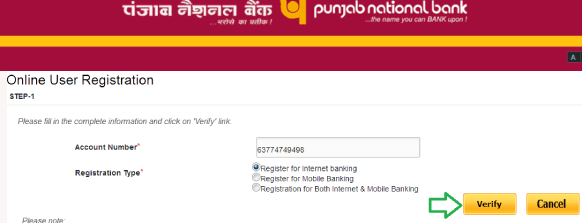
- Select the Registration Type and enter your account number.
- ‘Register for Internet Banking’ should be chosen.
- To verify, click the button.
-
- Mention the “Type of Facility” next. You receive a One-time Password at the provided mobile number. Press the “Continue” button after entering the OTP.
-
- Now, state the ATM pin and debit card number and select “Continue.”
-
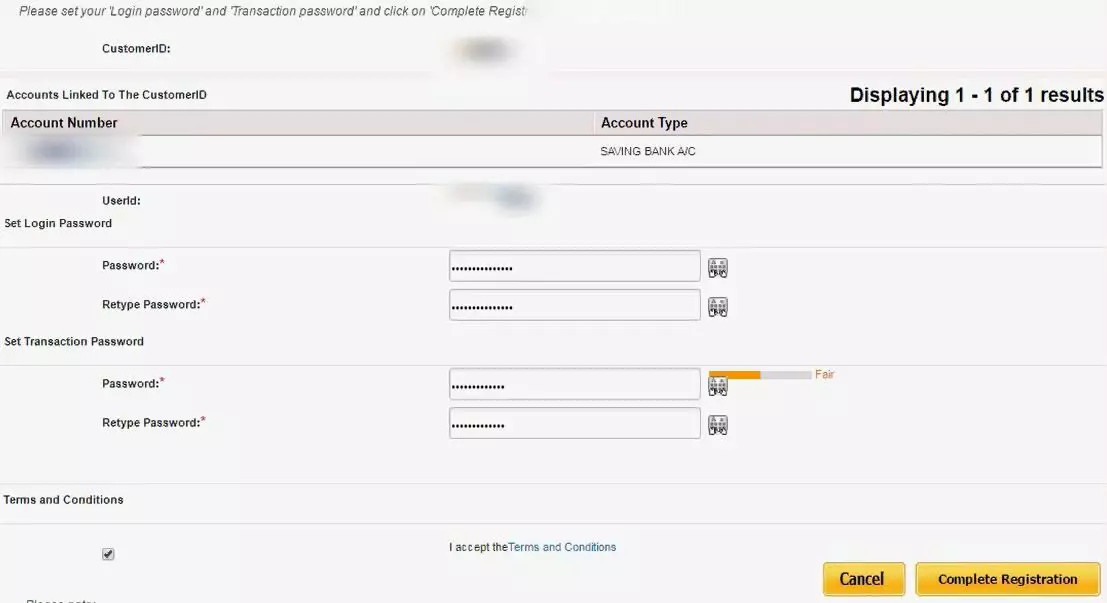
- Set a password for both the transaction and the login, then type it twice to be sure. However, the passwords for log-in and transactions shouldn’t be the same.
- The next step is to select “Complete Registration” and acknowledge your agreement to the PNB Net Banking Terms and Conditions.
-
- Your User ID will appear in a success message that is displayed on the screen. write down your User ID.
You will now be able to access the portal right away and log in. It will take 24 to 48 hours to use various banking services, nevertheless.
PNB Net Banking Registration for Corporate Users
Visit the bank branch if you want to activate or register for PNB Net Banking Corporate. To use the bank’s net banking services, you must download the PNB – 1063 form and submit it there.
-
- The PNB branch has this form on hand, and you can also download a copy of it from the bank’s website. You will receive a Corporate ID, Administrator ID, and password after submitting the form.
- The Company ID, which distinguishes the corporate, will be the same for both the Admin User and other users.
- The administrator oversees all operations, including the conclusion of transactions and the addition of new users.
PNB Internet Banking Login Procedure
The steps to log into PNB Net Banking for Retail Users
- Visit the Retail Users’ Net Banking Portal.
- Mention the User ID and then select “Continue.” Both the User ID and the Customer ID are static.
- Then, enter “Login” after typing your login password.
- Review and accept the terms and conditions.
- Your registered mobile number will receive an OTP. Enter the OTP by typing it.
- Next, select the “Register” option and answer seven of the 50 security questions that are offered.
- Select a picture, then add the relevant phrase. Press “Submit” to sign in.
How to Login PNB Corporate Net Banking?
Give business users access to the PNB Corporate Net Banking platform.
- The corporate admin needs their Corporate ID, Admin User ID, and password to enter into the net banking service. However, to use the net banking service, users must provide their User ID and Login password.
- When logging in for the first time, the user must enter the OPT that was provided to the administrator’s registered cellphone number.
- Seven security questions, phrases, and images must be configured.
- How do One transfer funds using PNB Net Banking?
- You must add the beneficiary to send money using PNB Online Banking.
Transfer of Money to the Account
For Corporate & Retail Users
-
- Step 1 is to log in to PNB’s online banking system.
- Step 2: Select the “Own Accounts” radio button under “Transactions.”
- Step 3: You must decide which account the money will be transferred from to other accounts.
- Step 4: After that, enter the amount and select “Continue.”
- Step 5: After entering the transaction password, click “Submit” to finish the payment choice.
Transferring Funds to an additional PNB Account
For Retail & Business Users
-
- Step 1: To log in to PNB Net Banking system.
- Step 2: Select the “Within PNB” option under “Transactions” after clicking the button.
- Step 3: Decide which account the funds should be deposited into. You must add the beneficiary if you can’t find them.
- Step 4: Enter the amount by typing.
- Step 5: The transaction date is always the current date. Additionally, you have the option to alter the transaction date for subsequent payments.
- Step 6: Select “Continue.”
- Step 7: To complete the transaction option, type the transaction password and press “Submit.”
Conclusion
We hope that after reading this article, you have a better understanding of how PNB net banking works.

